> ## Documentation Index
> Fetch the complete documentation index at: https://docs.voicemetrics.ai/llms.txt
> Use this file to discover all available pages before exploring further.
# Web Widgets
> Turn your website or landing page into a powerful lead capture tool with AI-powered voice widgets. Web widgets enable visitors to start live voice conversations instantly—no forms, no delays.
## **Overview**
Web Widgets allow you to embed a **“Click-to-Call”** feature directly on your website. When clicked, the widget initiates a real-time voice conversation between your site visitor and your AI Agent.
This provides a fully automated, conversational experience for users while helping businesses capture, qualify, and convert leads effortlessly.
* Fully white-labeled – runs under your brand, logo, and messaging
* 24/7 automated engagement without needing a live agent
* Integrated with CRM and calendar systems for seamless follow-up
## **Use Cases**
Web Widgets are ideal for:
* **Marketing Landing Pages** – Let visitors instantly speak to your AI Sales Assistant.
* **Service-Based Websites** – Capture inquiries or bookings directly from your homepage.
* **Appointment-Driven Businesses** – Instantly qualify and book appointments via AI.
* **Lead Capture Funnels** – Replace static lead forms with interactive voice conversations.
## **Creating a Web Widget – Step-by-Step**
Follow the steps below to create and deploy a custom web widget:
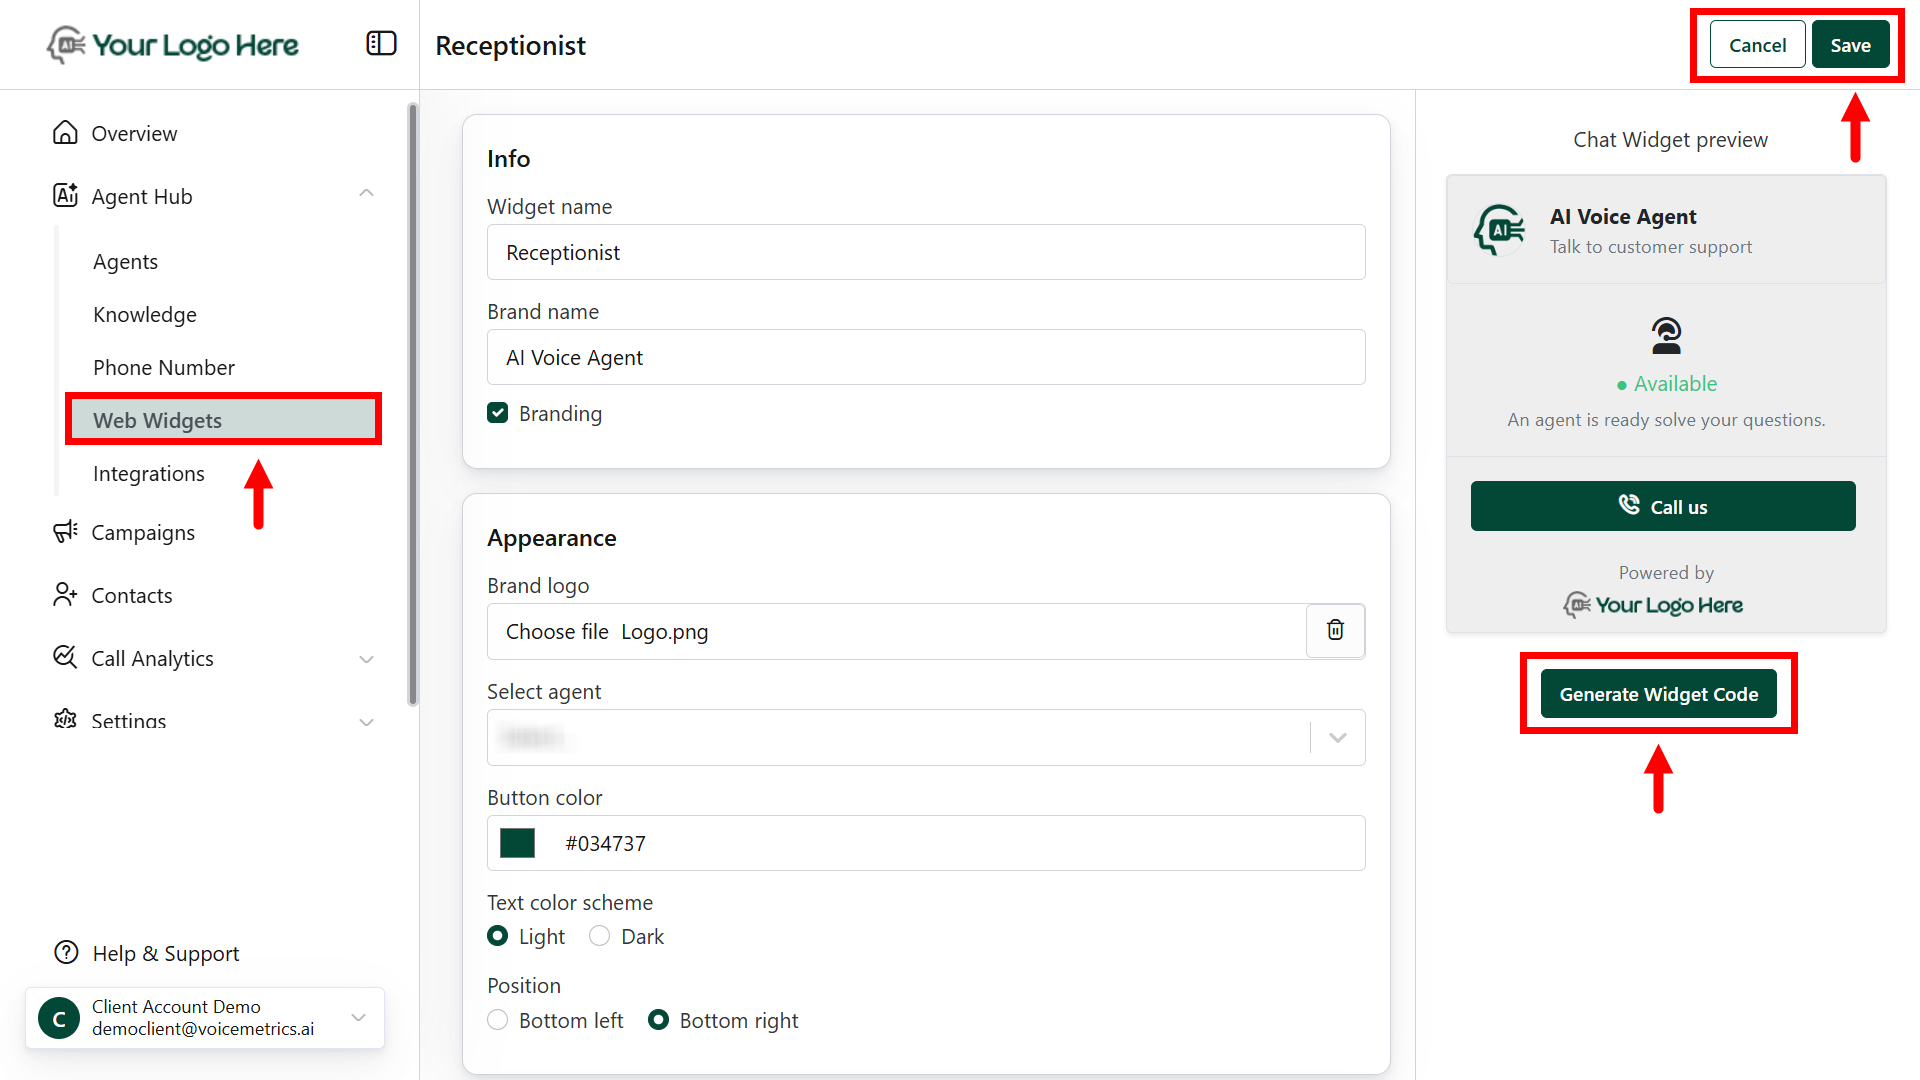
* Go to your client account > Settings > Web Widgets tab.
* Click the Create Widget button to begin setup.
* **Widget Name** – e.g., “Sales Widget”
* **Brand Display Name** – Name shown in the widget interface
* **Logo** – Upload a logo to appear on the widget
* **Display Message** – Custom welcome message (e.g., “Talk to our Sales Agent”)
* **CTA Text** – Call-to-action button label (e.g., “Start Voice Chat”)
* Assign the appropriate AI agent who will handle the web calls.
* Go to Agent > **Deploy** Tab
* Select the created widget and assign it to the agent
* Copy the embed code and place it on your website or landing page.
 **Pro Tips**
Use clear CTAs like “**Talk to Our Assistant**” or “**Need Help? Speak Now!**”
Assign **dedicated agents** for widget interactions to track performance.
**Combine with CRM** and analytics tools to monitor engagement and conversions.
**Pro Tips**
Use clear CTAs like “**Talk to Our Assistant**” or “**Need Help? Speak Now!**”
Assign **dedicated agents** for widget interactions to track performance.
**Combine with CRM** and analytics tools to monitor engagement and conversions.