Why Use a Custom Domain?
- Reinforce your agency’s identity by replacing generic URLs.
- Offer a seamless and consistent brand experience.
- Enhance client trust by establishing a domain they recognize as yours.
Setup Instructions
1
Choose Your Custom Domain
Select a subdomain like app.yourdomain.com to host your white-labeled platform.
2
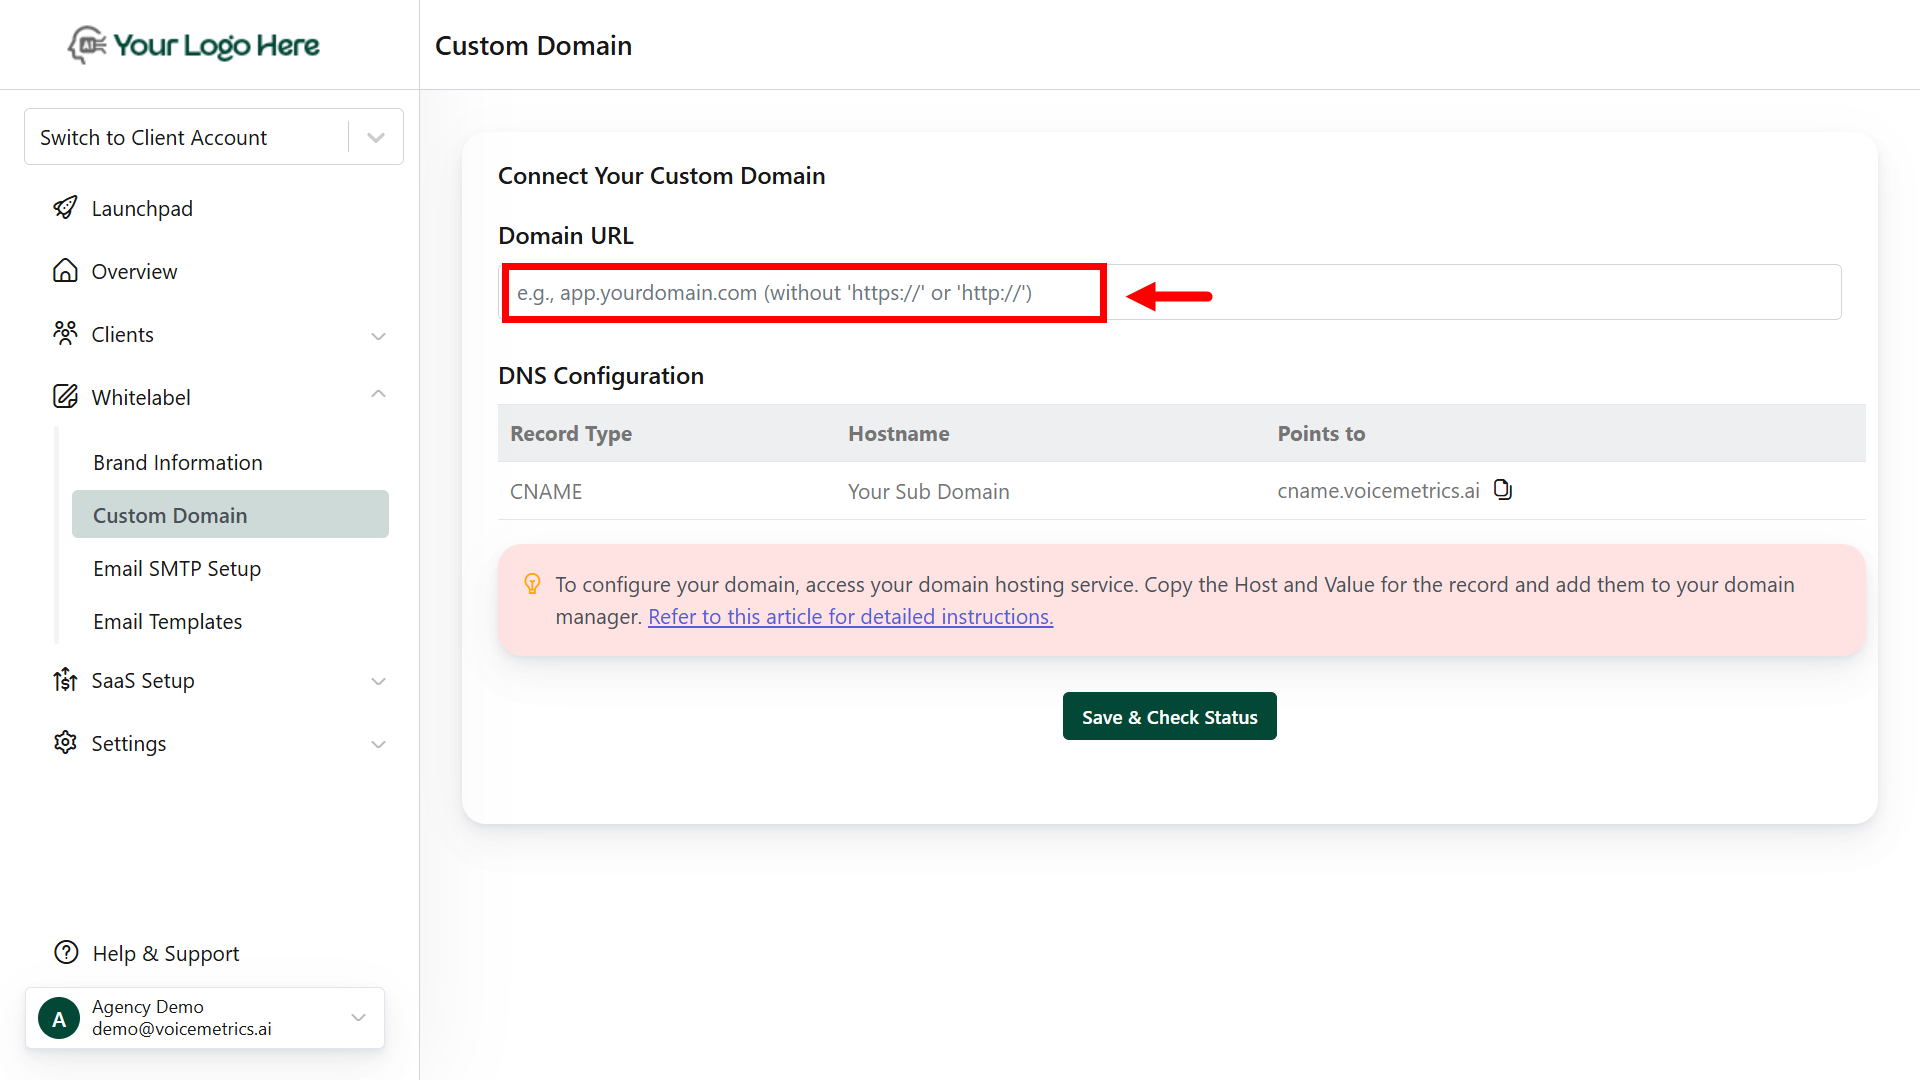
Add Your Domain in the Agency Panel
- Log in to your Agency Panel.
- Navigate to the Custom Domain section.
-
Enter your subdomain (e.g., ai.yourdomain.com) and click Check Status.
3
Update DNS Records
- Log in to your domain registrar (e.g., GoDaddy, Namecheap, Bluehost, etc.).
- Navigate to the DNS Settings or DNS Management.
-
Add a CNAME Record with the following details:
- Type: CNAME
- Host: app (or your preferred subdomain prefix)
- Value / Points to: cname.voicemetrics.ai
- Save the DNS record.
-
Allow some time for DNS changes to propagate (typically a few minutes to 24 hours).
4
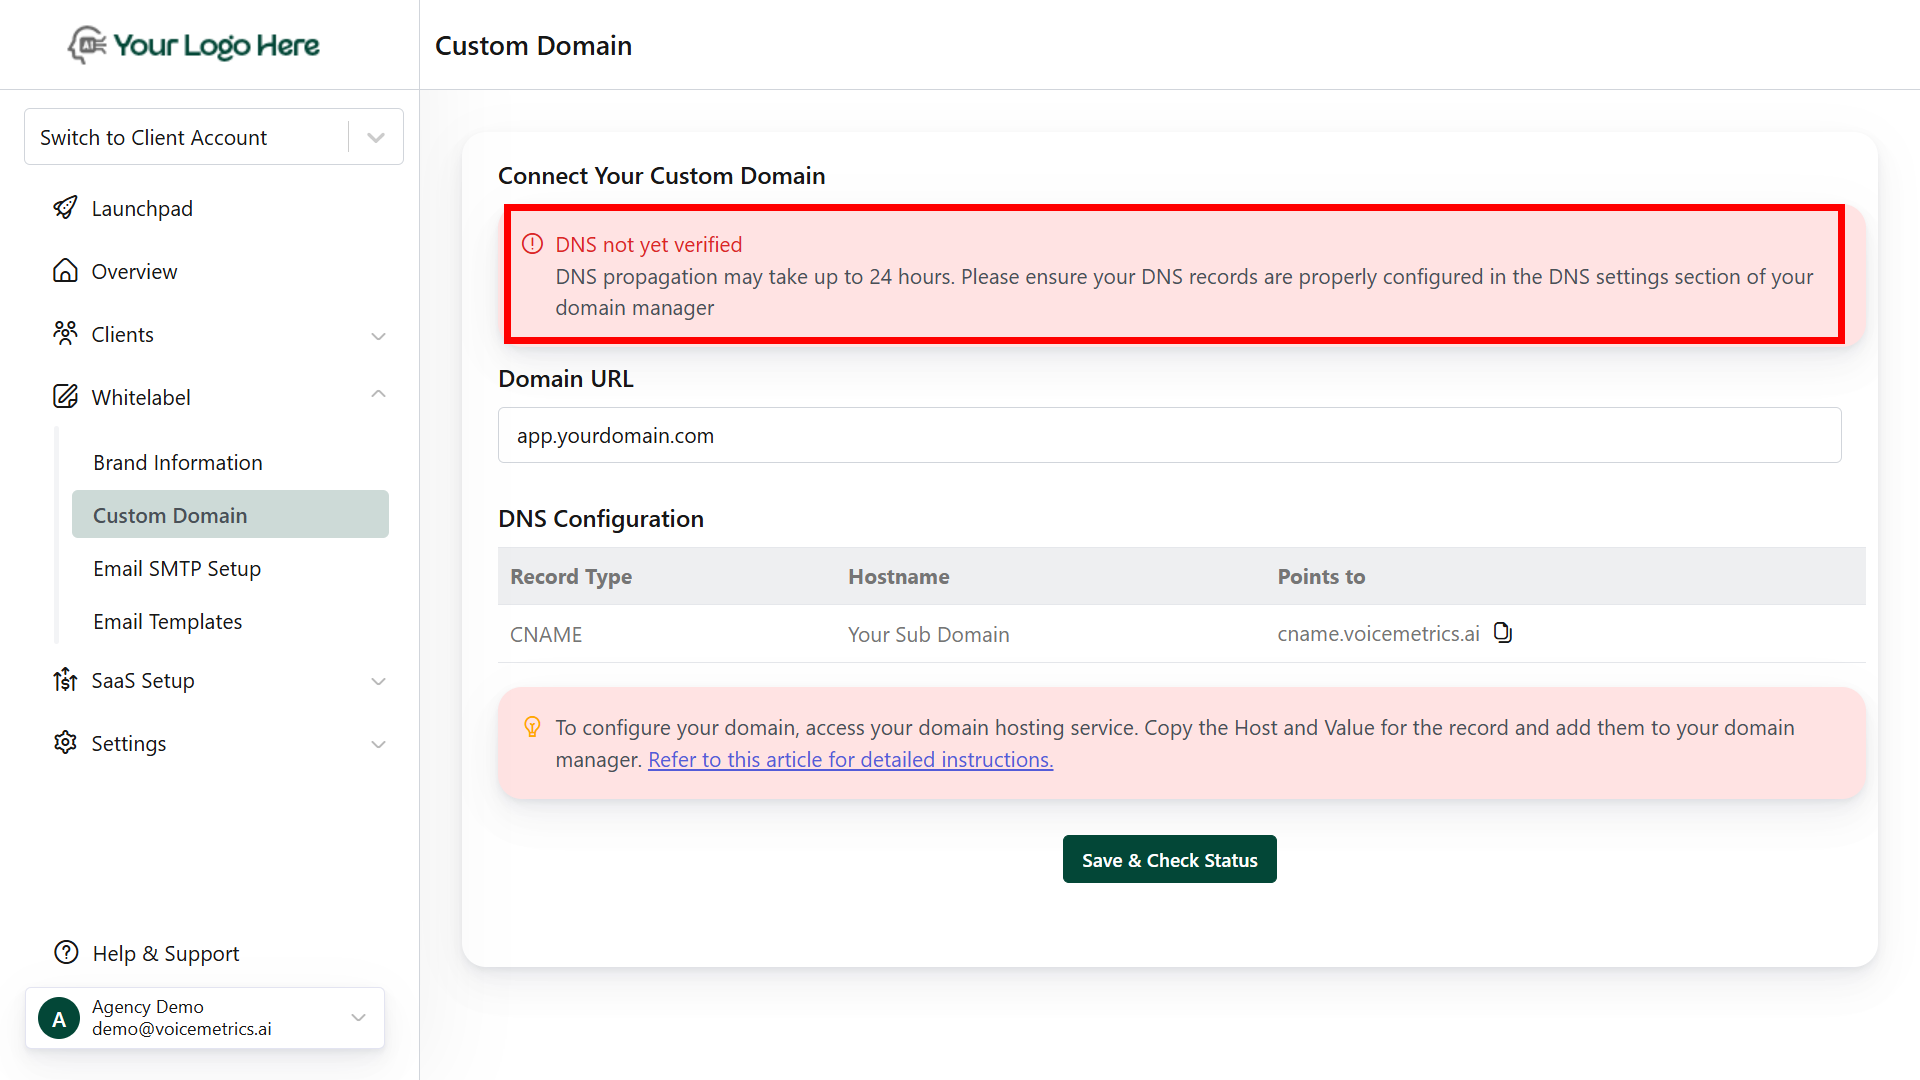
Verify the Domain
After updating DNS:
- Return to the Custom Domain panel.
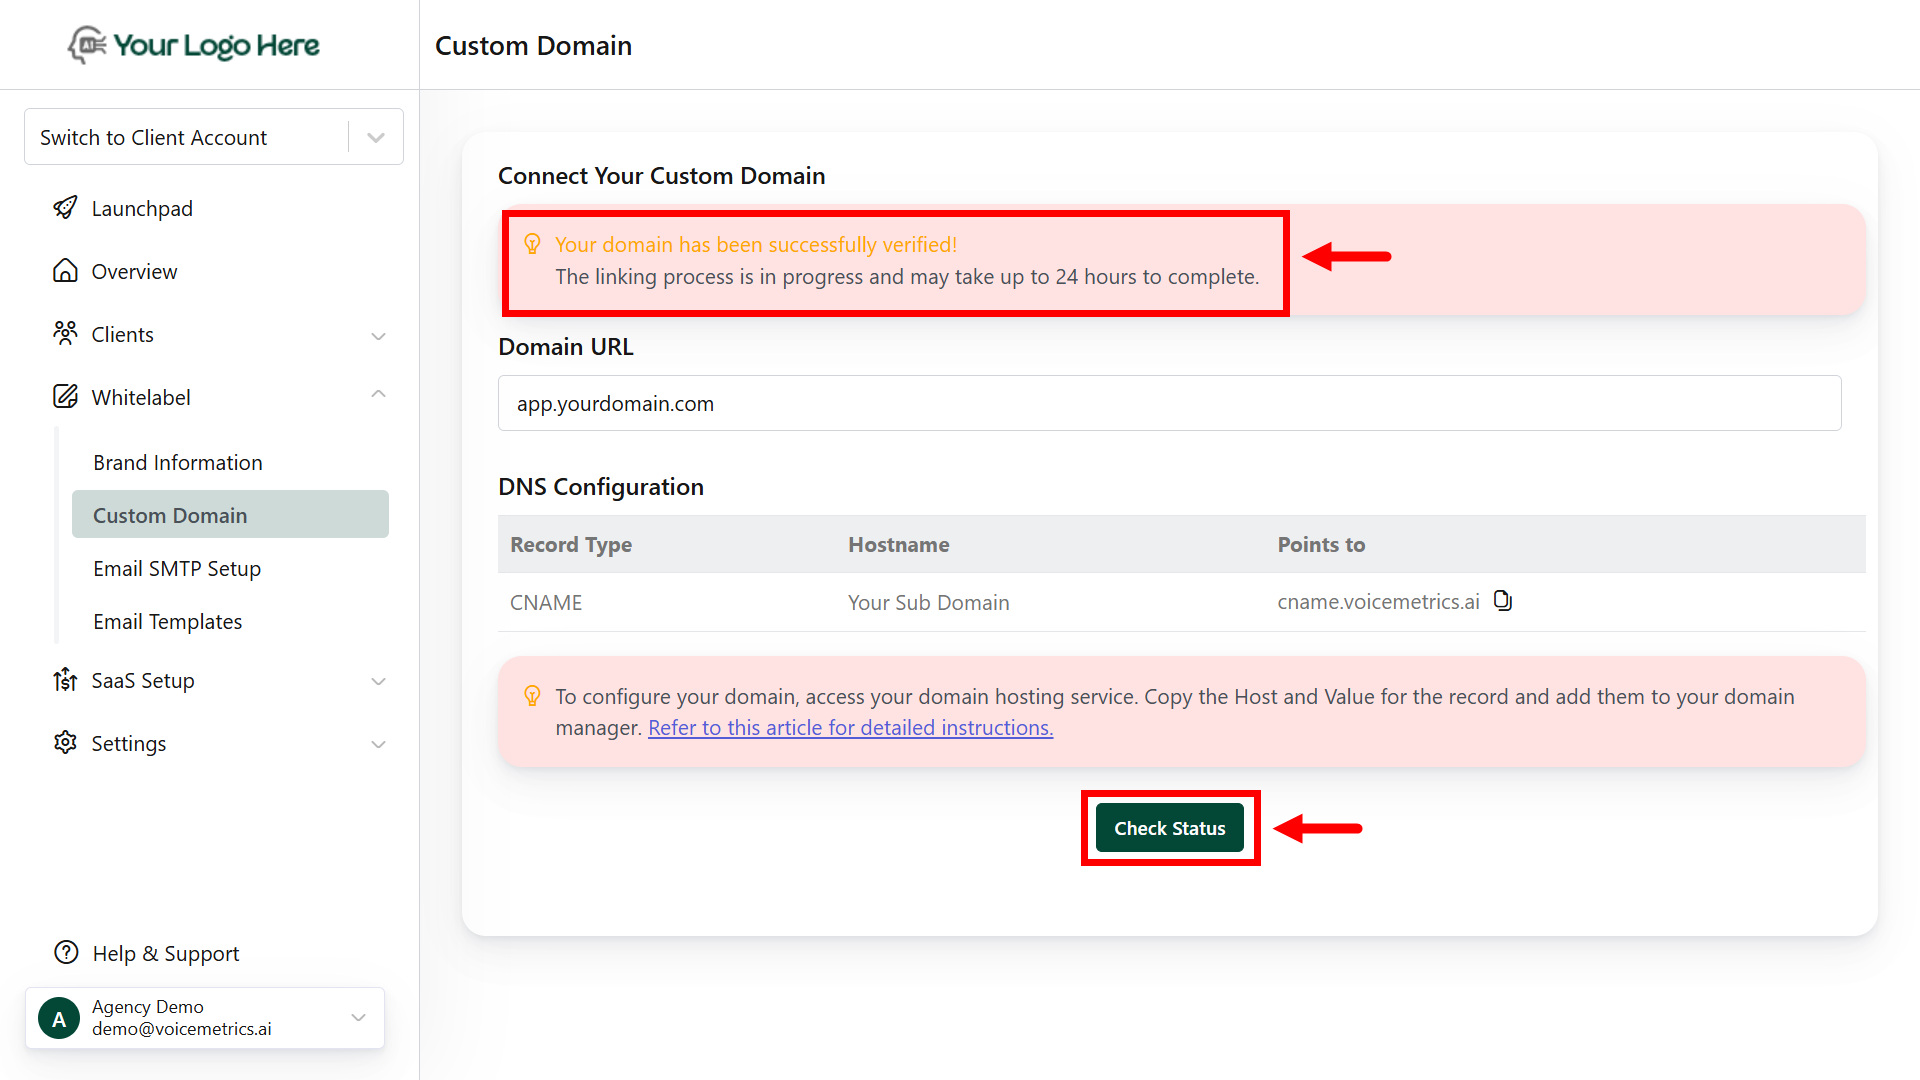
- Click Check Status to trigger verification.
-
DNS propagation may take from a few minutes to 24 hours.
5
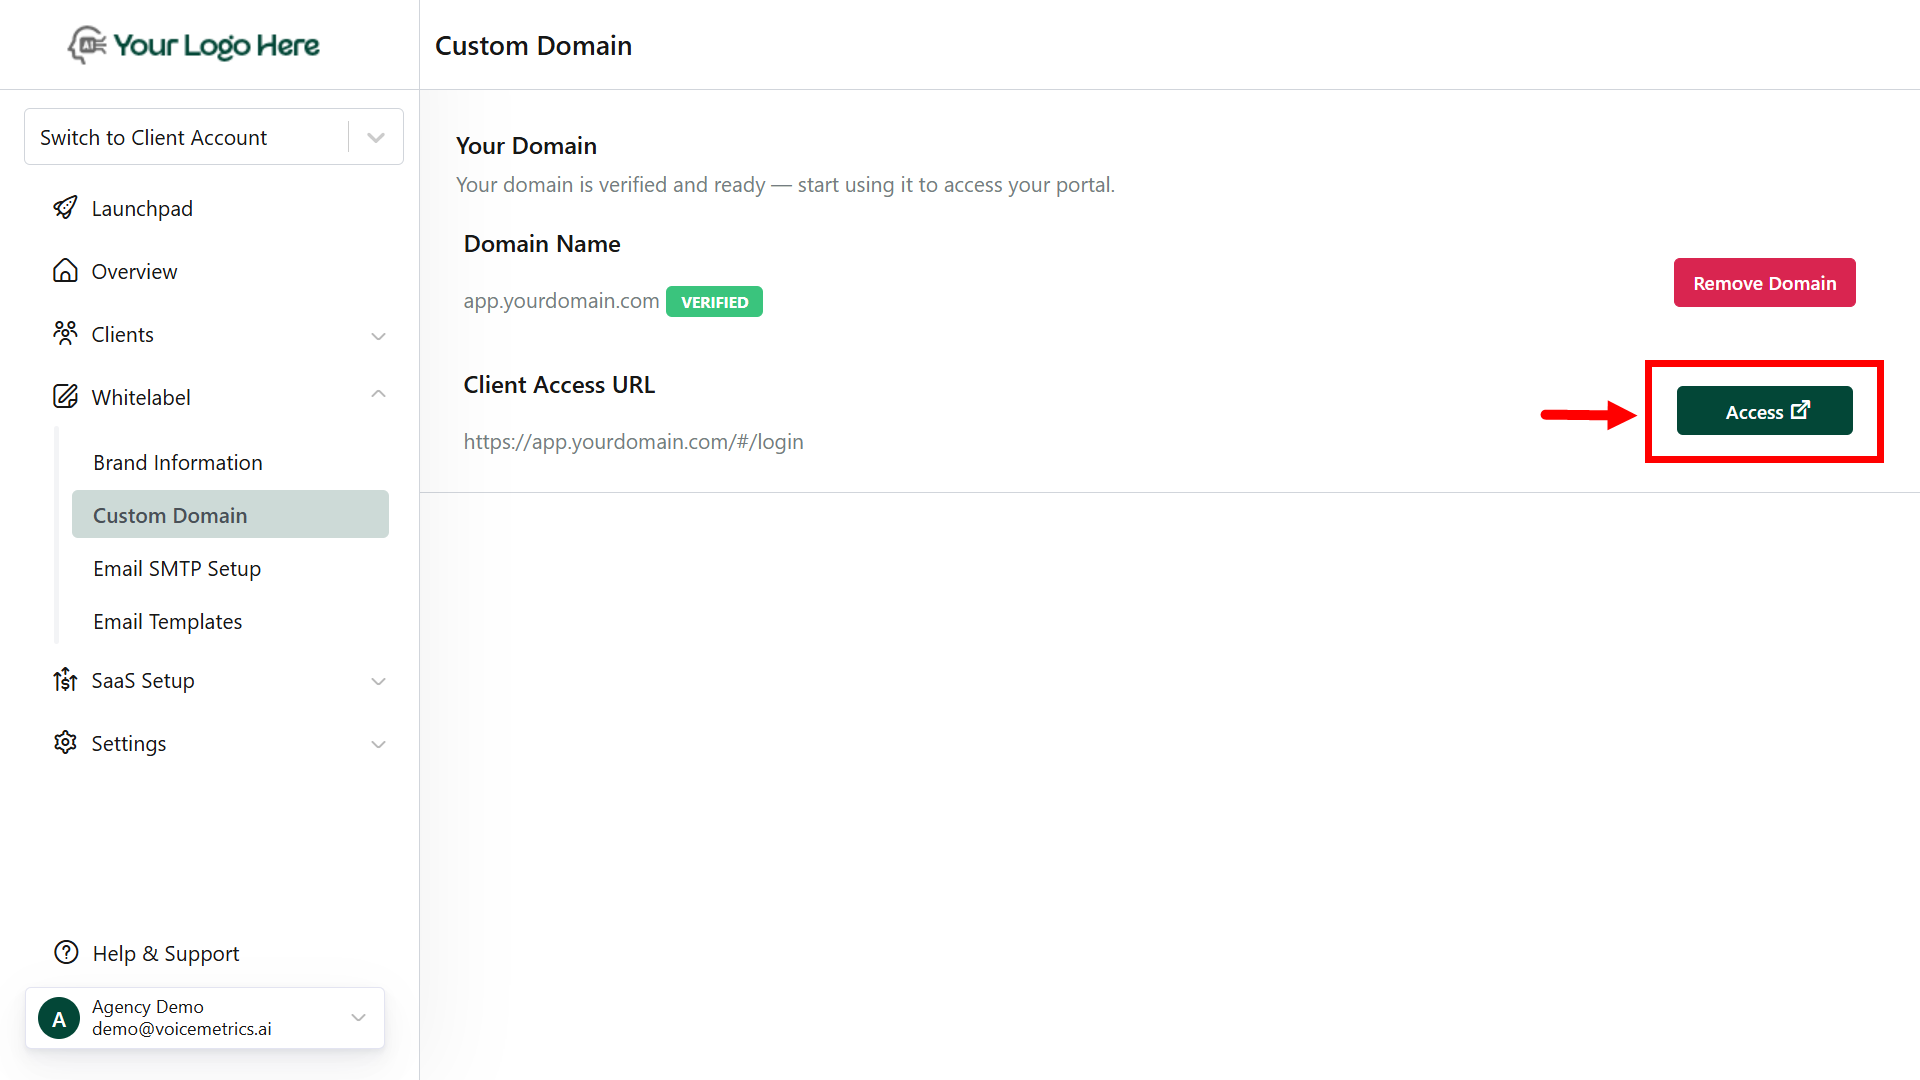
Go Live with Your Custom Domain
Once verified:
- The platform becomes accessible via your custom domain.
- Open the custom URL in your browser to confirm it loads correctly.
-
Log in to ensure full functionality under your white-labeled domain.
SSL Certificate: The system auto-generates an SSL certificate; if not, install it manually.
DNS Propagation: It may take up to 24 hours globally for changes to take effect.
Frequently Asked Questions
1. Do I have to use app.mydomain.com?
1. Do I have to use app.mydomain.com?
Not at all. You can use any subdomain, but app. is a common and professional choice. Subdomains allow flexibility while maintaining a clean separation from your main website.
2. What’s the best practice for domain usage?
2. What’s the best practice for domain usage?
Here’s a recommended setup:
- Main Website: yourdomain.com – for marketing, lead capture, etc.
- White-Label Platform: app.yourdomain.com – for your branded client access