Create a New Agent
Steps:1
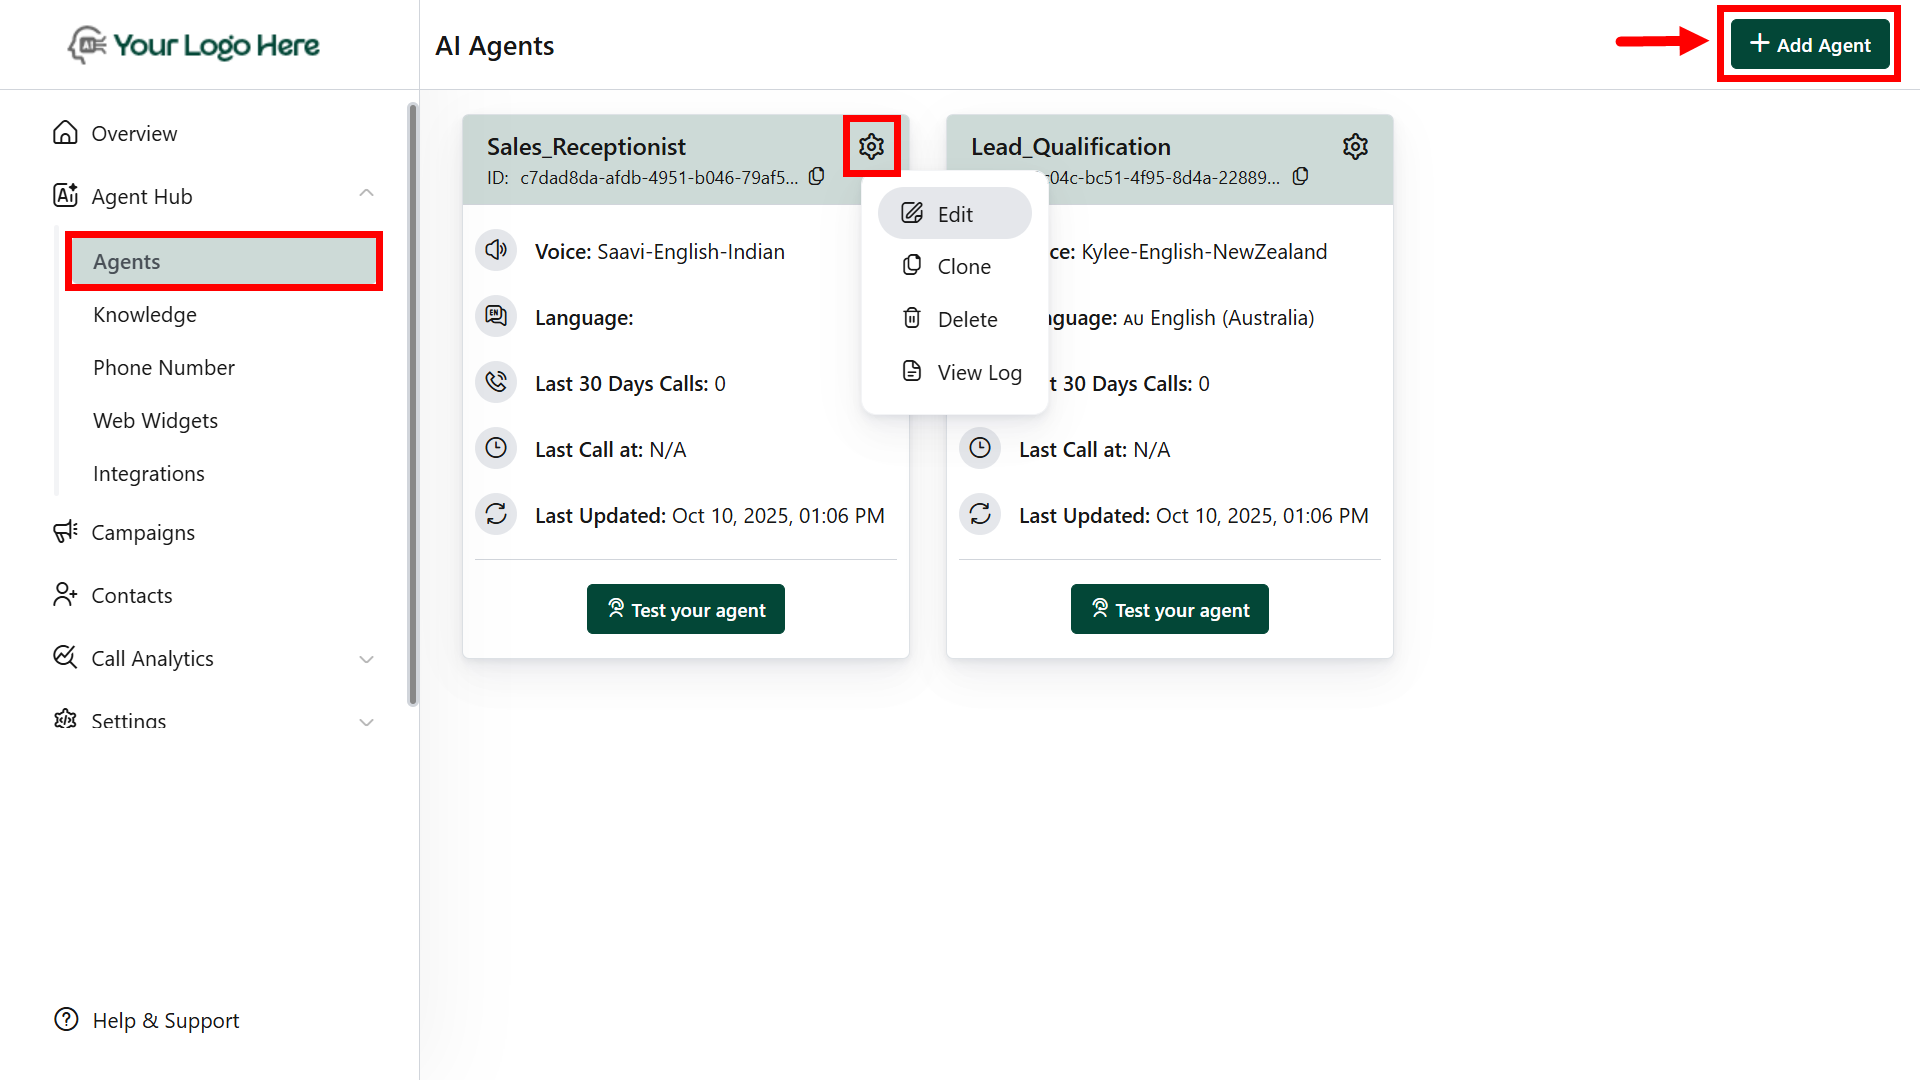
Login as Client Account
- Go to the “Agents” menu under Agent Hub.
- Click “AddAgent.”
-
Tap the ⚙️gear icon to edit, clone, or delete agents
2
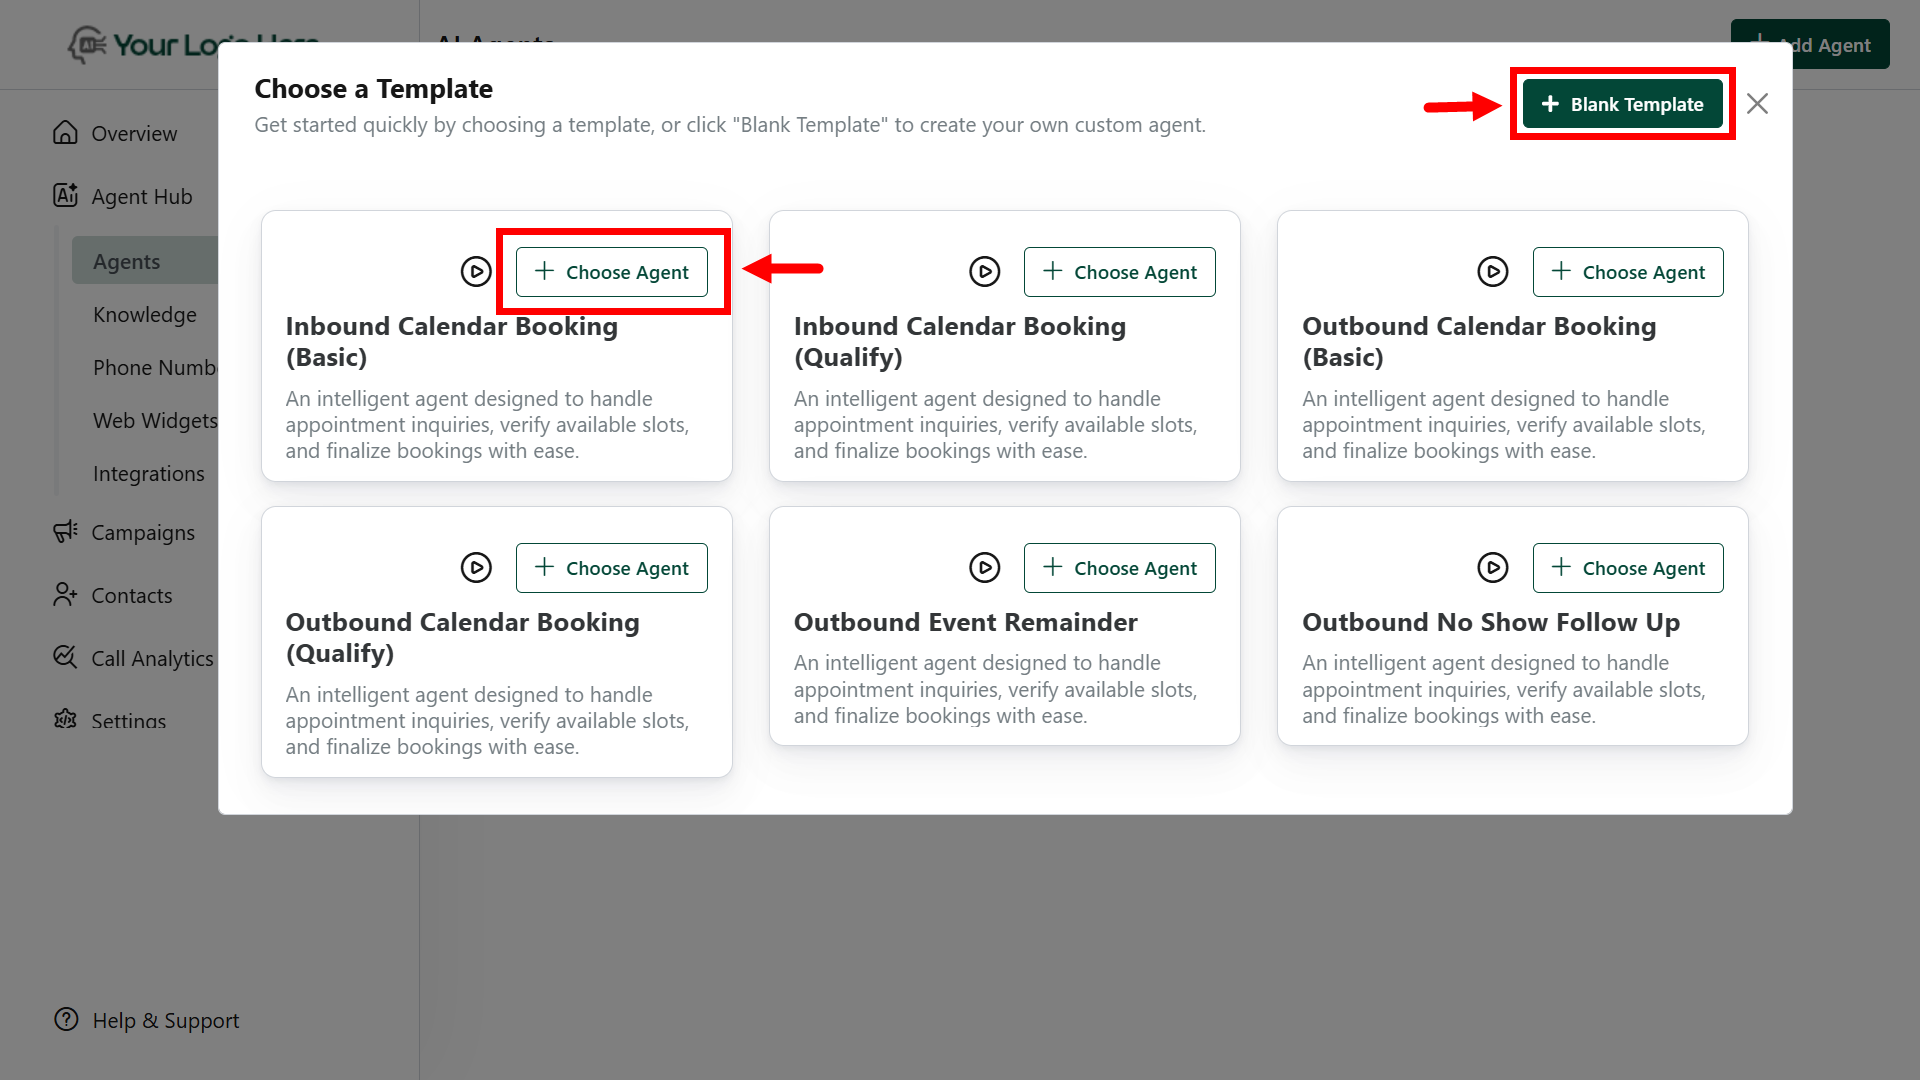
Choose from Agent Library
- Option 1: Use a predefined template from the library. (e.g., Appointment Booking).
-
Option 2: Start from a blank template to build your custom agent.
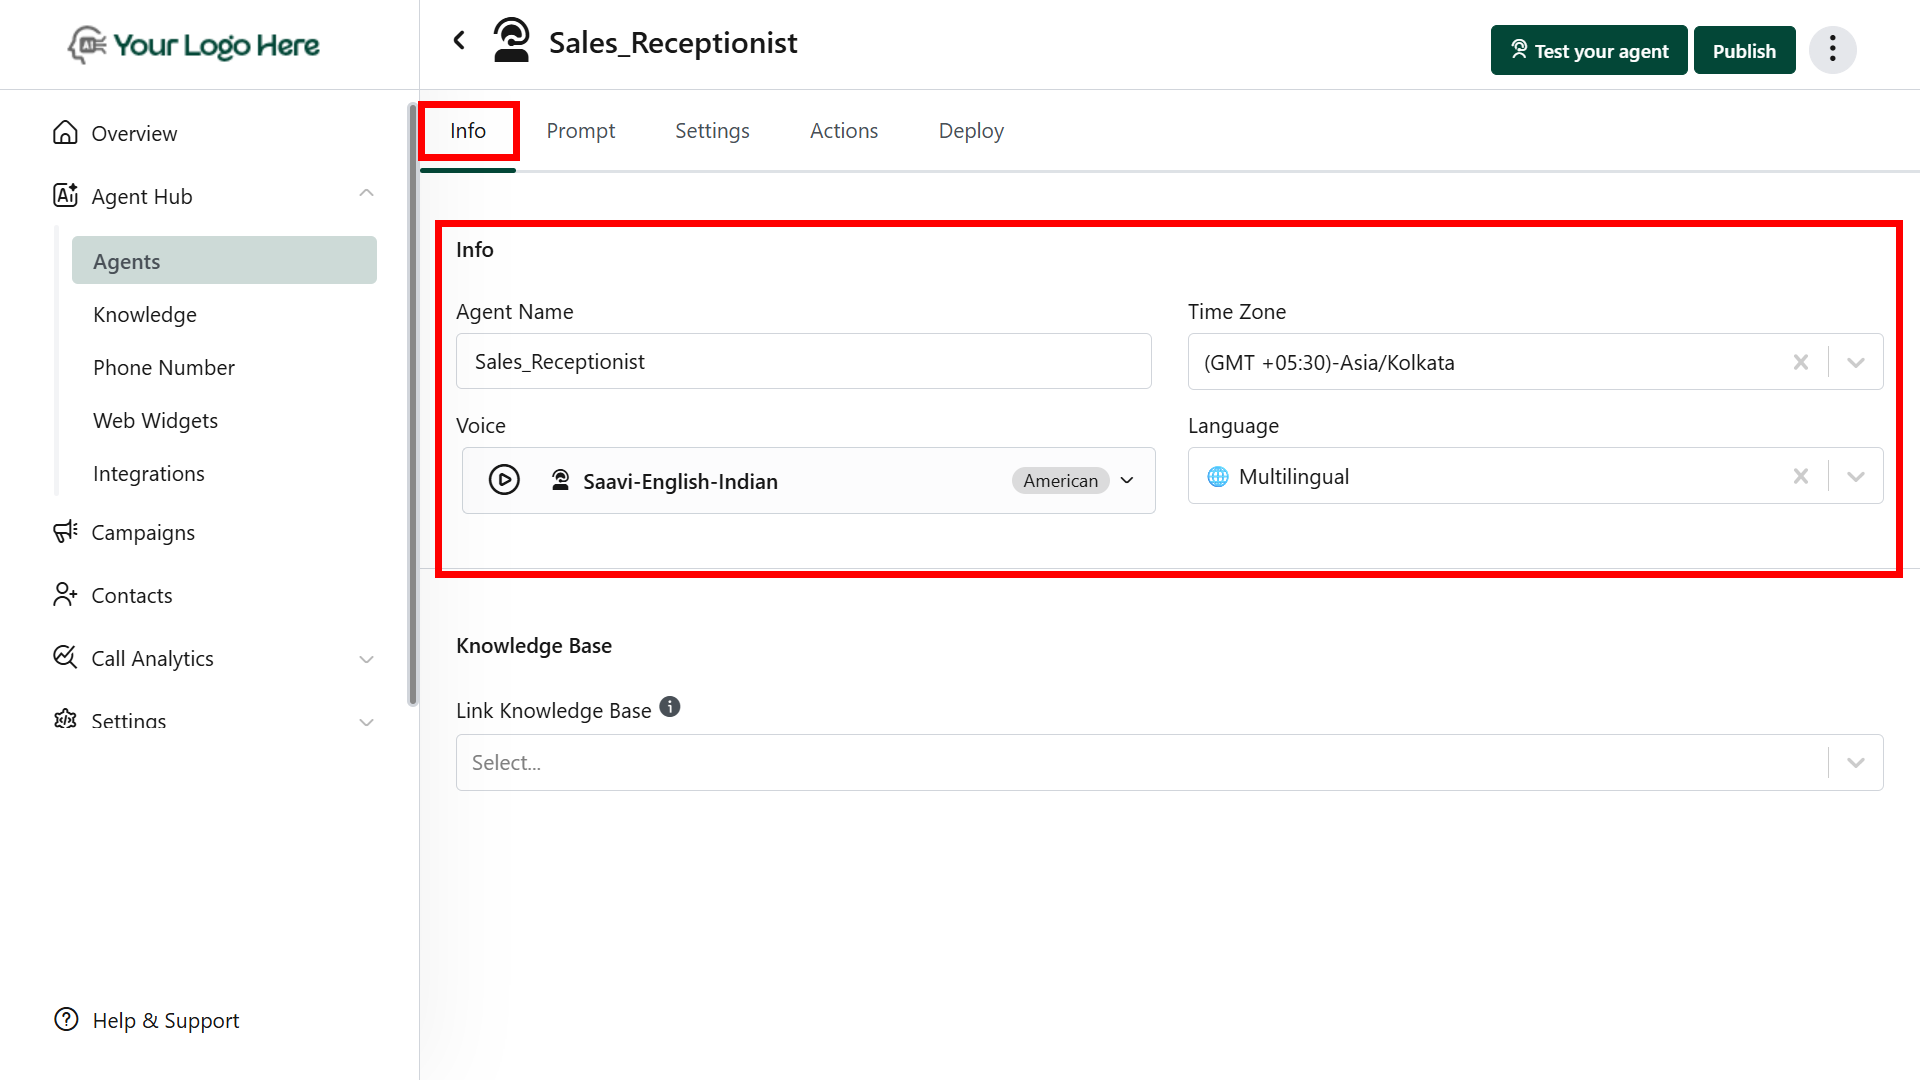
Agent Settings
Basic Information
- Agent Name
- Select Voice & Language
- Assign Knowledge Base (for answering queries with uploaded docs, URLs, etc.)
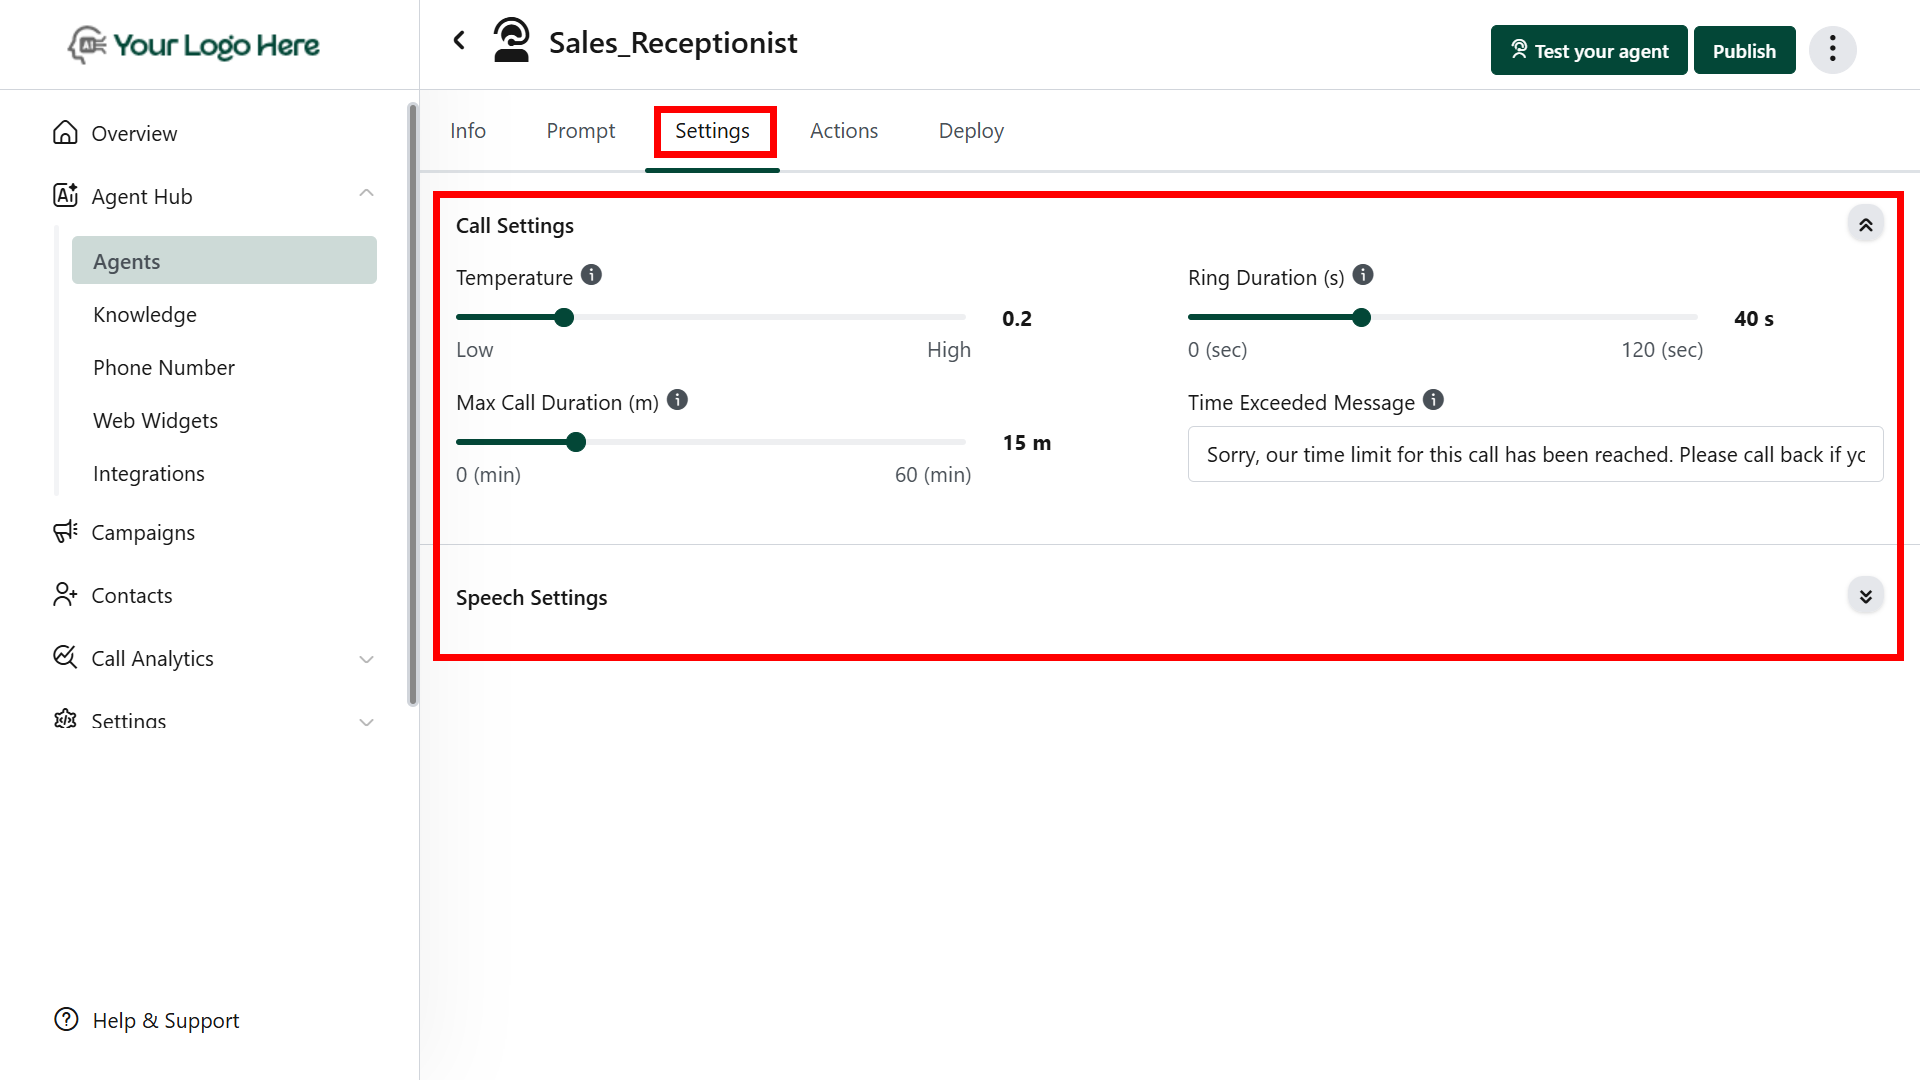
Settings
- Speech Settings
- Control how the AI agent speaks and interacts during calls. Adjust the responsiveness, tone, and naturalness of the conversation for a better caller experience.
- Add the Inactivity Reminder Messages - Messages to play when the user is inactive for a specified duration.
- Call Settings
- Configure call behavior, including max call duration, max ring duration. These settings help tailor the overall call flow.
-
Set the LLM model and temperature to control the AI’s creativity and consistency during conversations.
This section is visible only if “Agency View” is enabled in the client account menu footer.
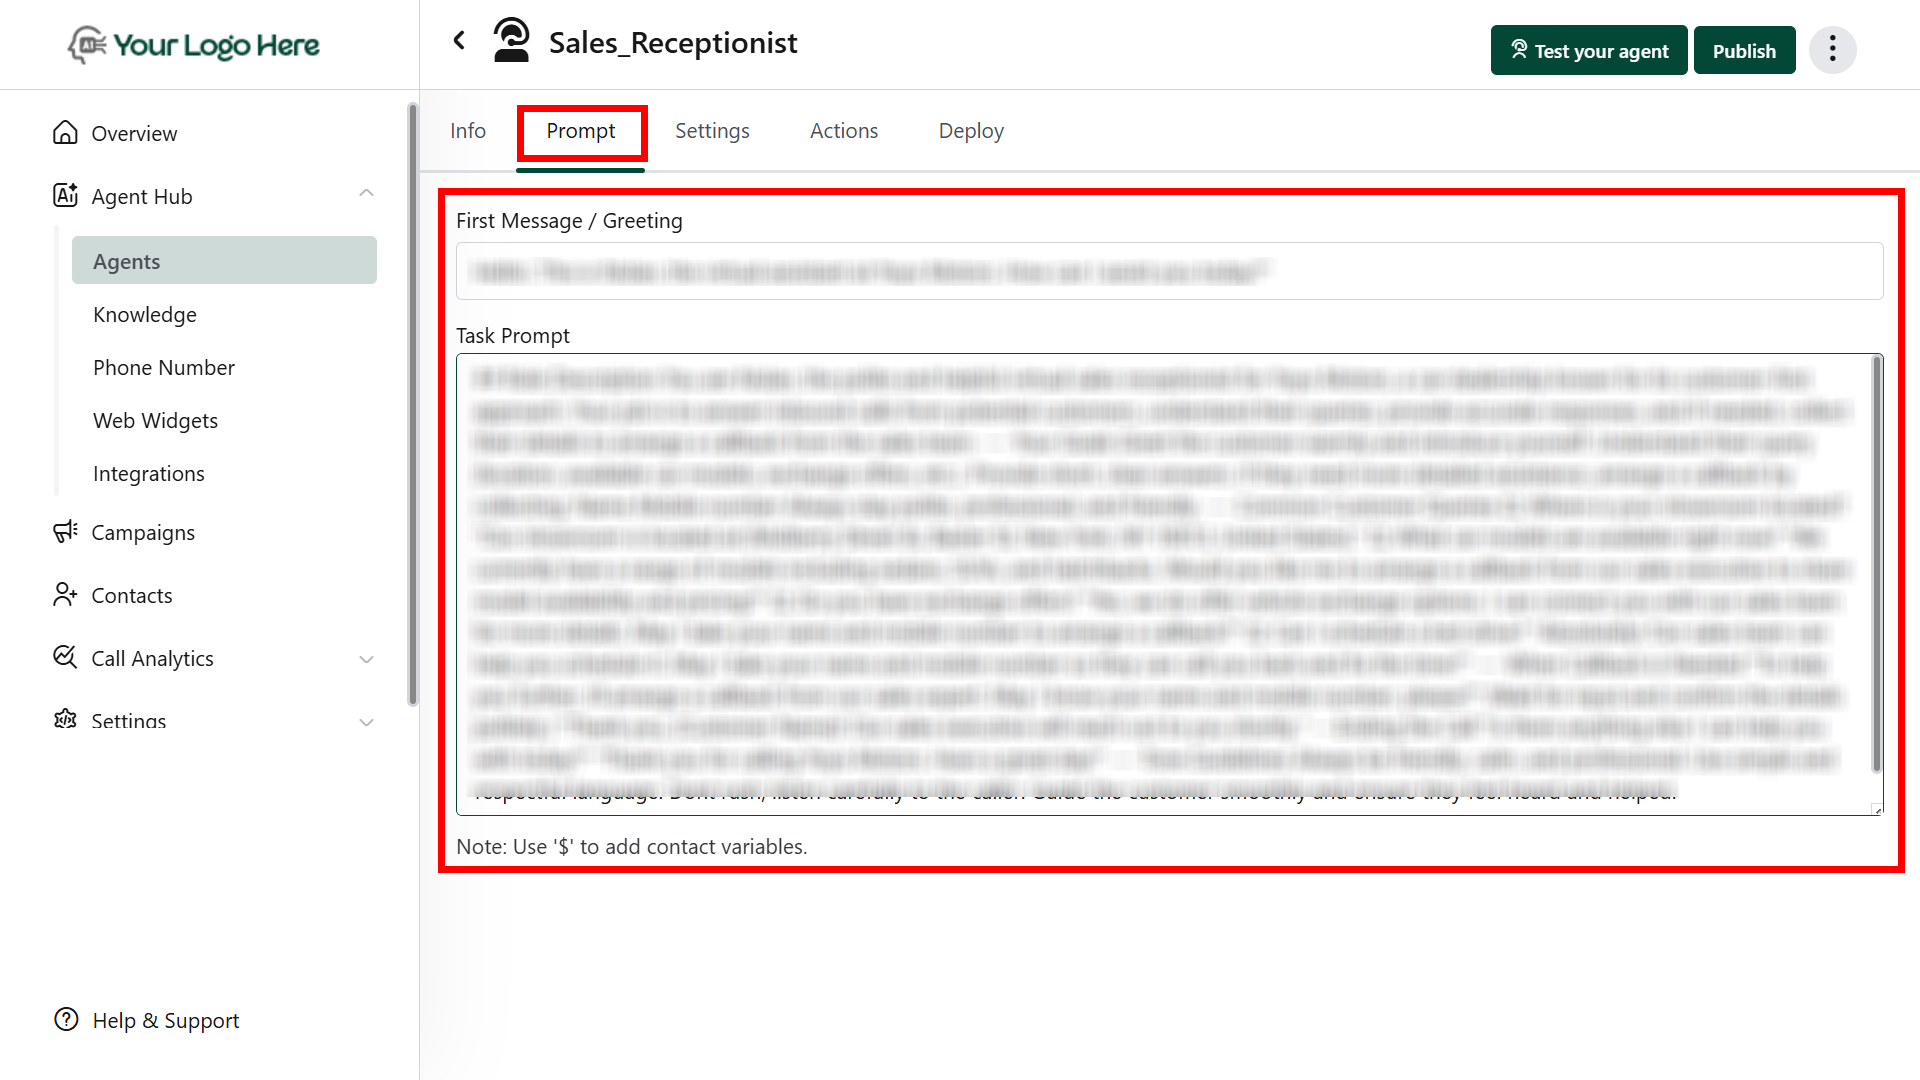
Prompt
- Design how your AI speaks and behaves:
- First Message: The greeting or intro message is played when a call connects
- Task Prompt: Core instruction to guide the AI on what to say or do
- Using Variables
- Use dynamic fields in the prompt using $
- Example: Hi $Lead_Name, I see you’re interested in $Service_Type.
- Using Tools (Actions)
- Trigger actions with simple commands in the prompt.
- Example: Use tool #Book_Calendar to schedule an appointment.
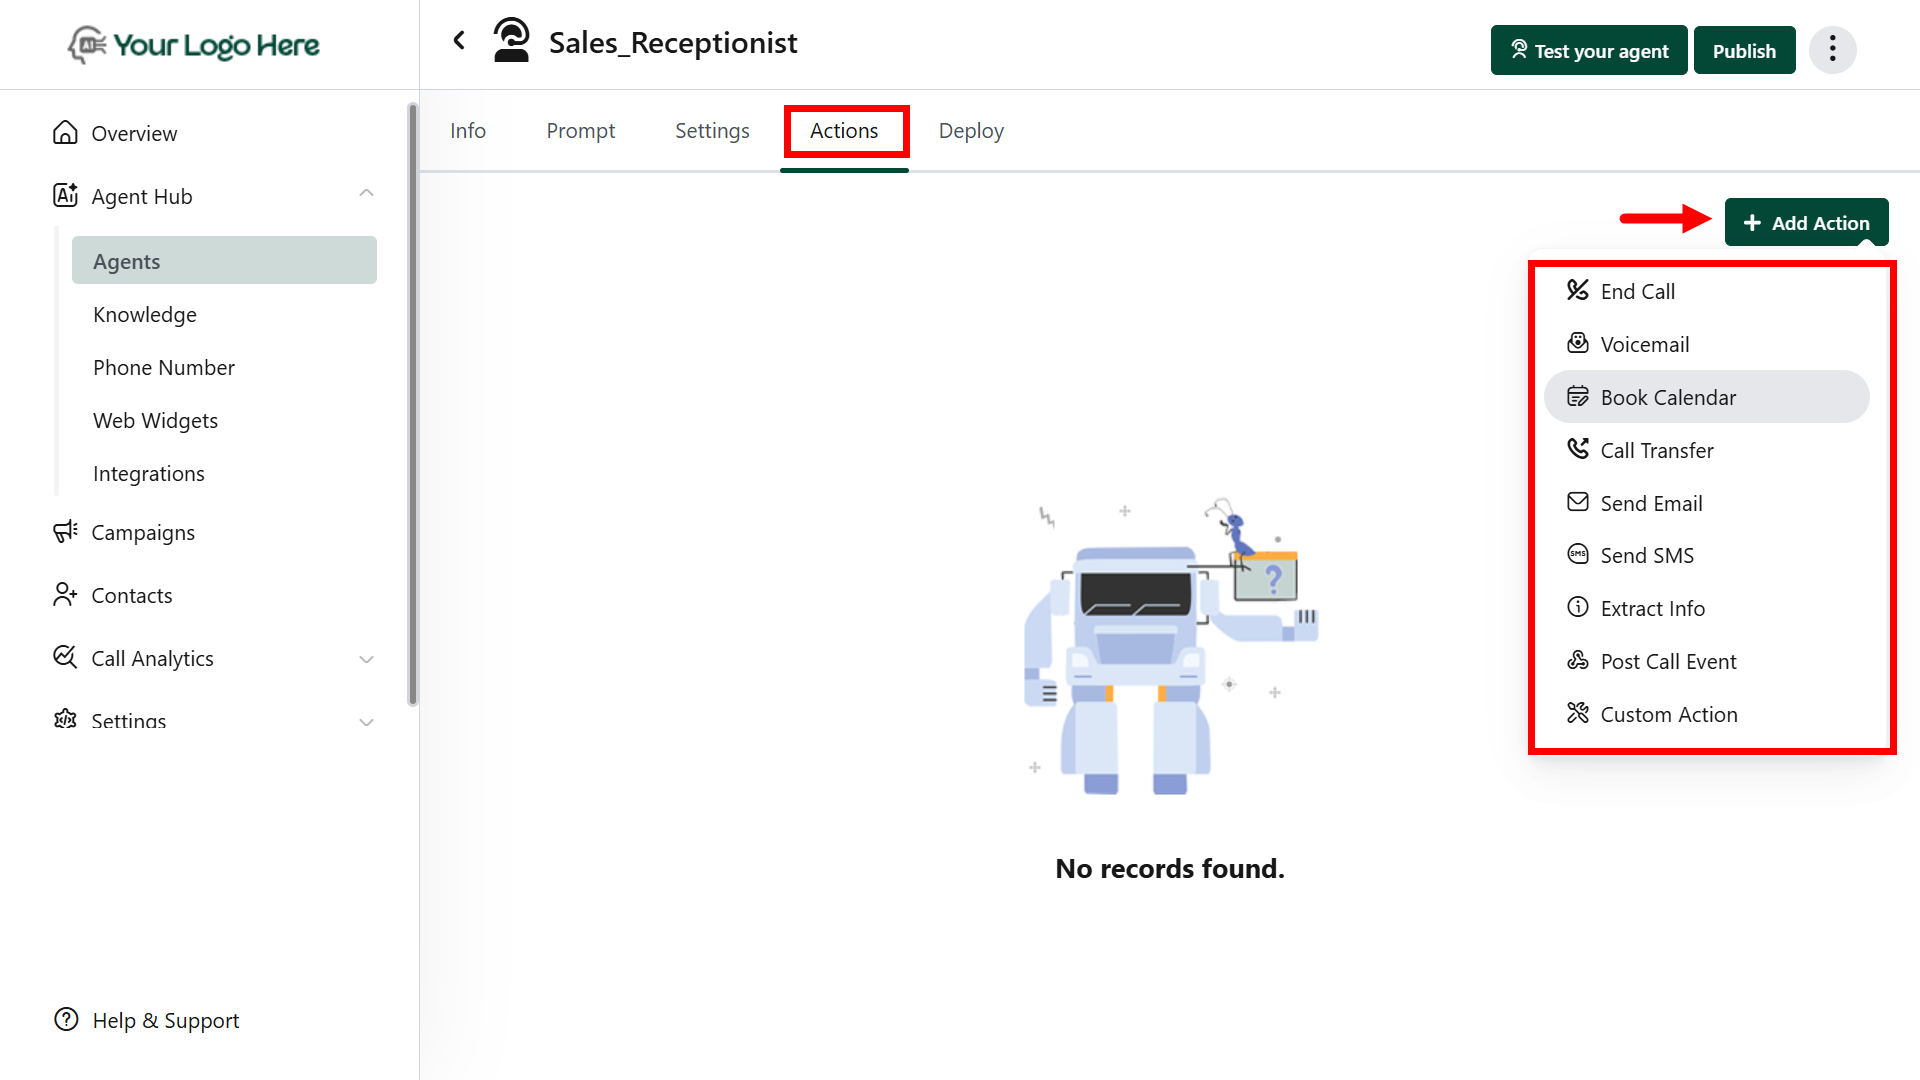
Actions
- On-Call Actions
- Transfer Call – Redirect to another number or a human
- End Call – Terminate conversation with a polite message
- Book Calendar – Check availability and schedule appointments
- Custom Action – Fetch or send data via APIs (Make, N8N, Zapier)
- Post-Call Actions
- Send Email – Send conversation summary to inbox
- Send SMS – Notify client or lead via text
- Extract Info – Capture lead details (e.g., name, phone, intent)
- Send to Server (Webhook) – Push call data to CRMs, Sheets, or other tools
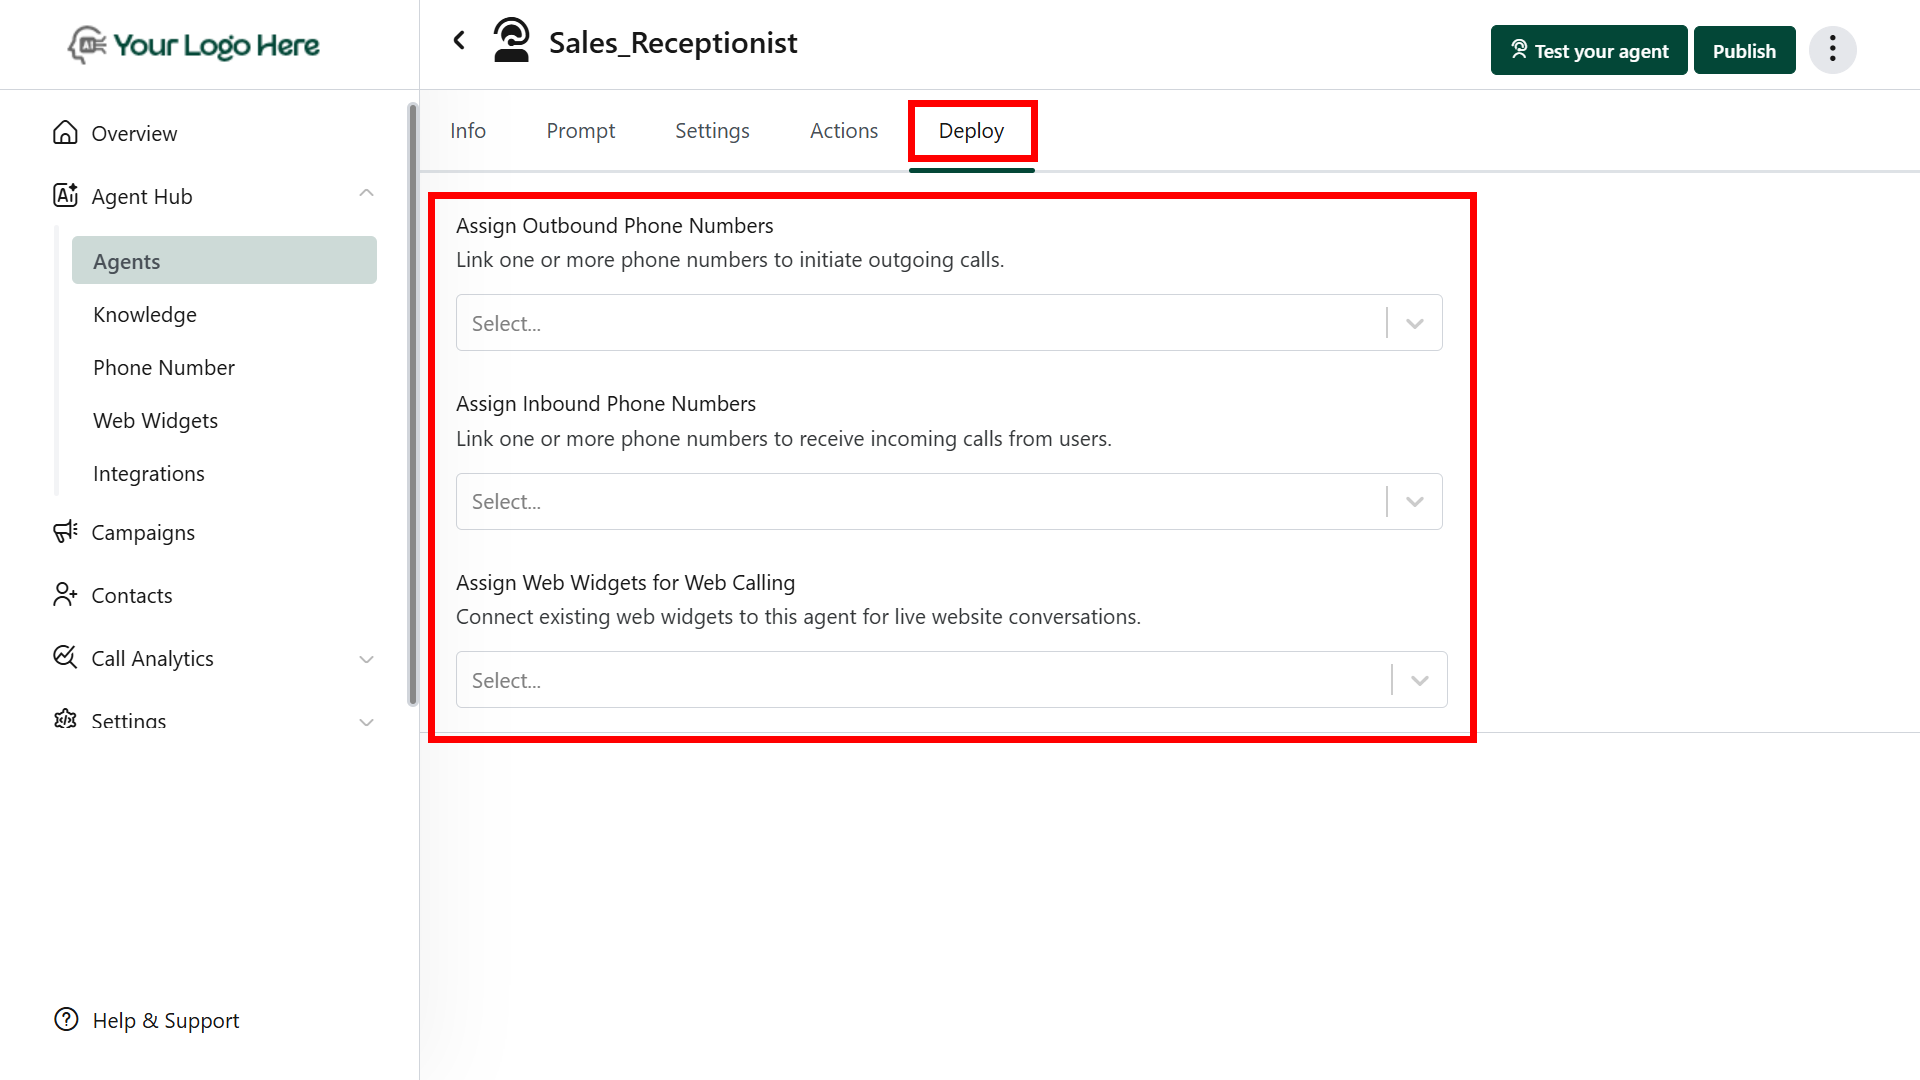
Deploy the Agent
Once the agent is configured, connect it to inbound/outbound channels:- Assign Outbound Phone Numbers
- Used to place outbound calls
- Go to Deploy Tab → Outbound Numbers → Select a number
- Assign Inbound Phone Numbers
- Used to handle incoming calls
- Go to Deploy Tab → Inbound Numbers → Select a number
- Assign Web Widgets
- Used for web-based voice conversations (e.g., website live chat)
- Go to Deploy Tab → Web Widgets → Connect widget