Create a Client Account
Create a New Agent
Steps:1
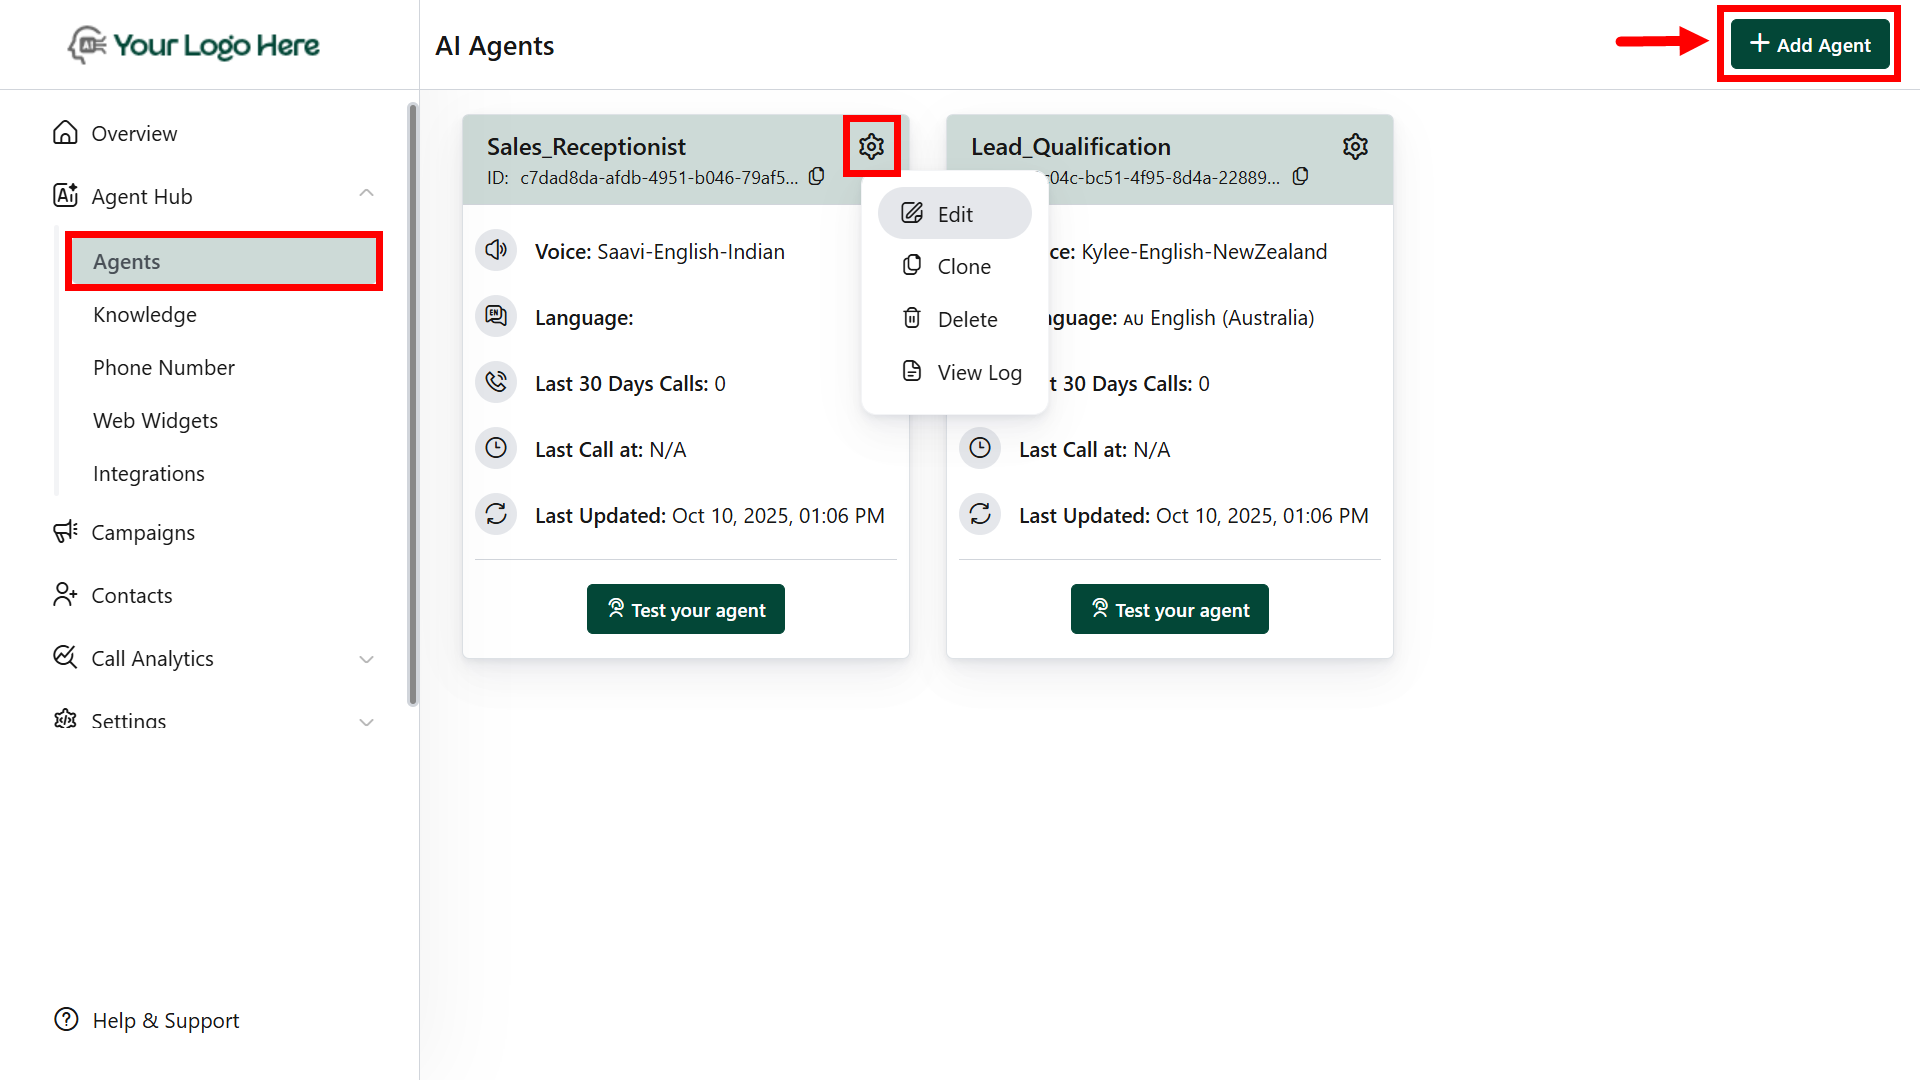
Inside the Client Account
- Go to the “Agents” menu under Agent Hub.
- Click “AddAgent.”
-
Tap the ⚙️gear icon to edit, clone, or delete agents
2
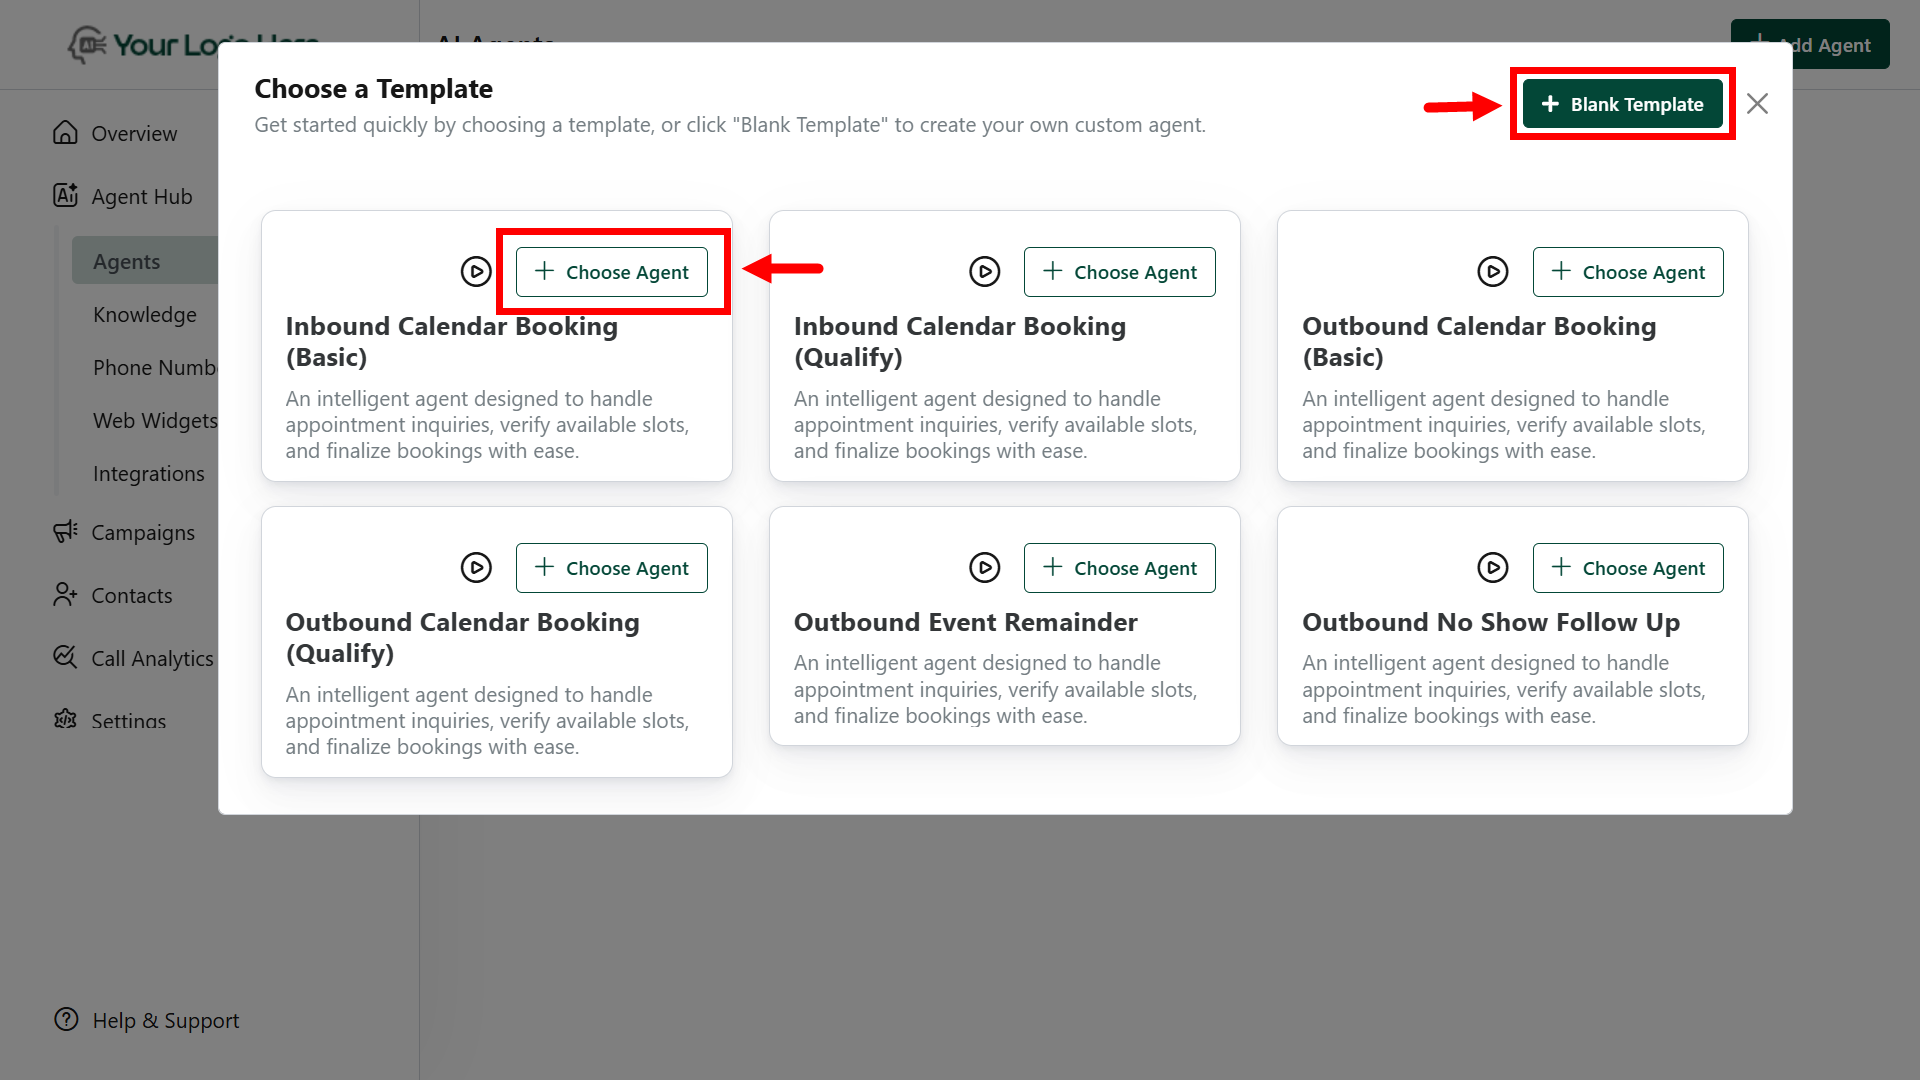
Choose from Agent Library
- Option 1: Use a predefined template from the library. (e.g., Appointment Booking).
-
Option 2: Start from a blank template to build your custom agent.
Core Agent Setup
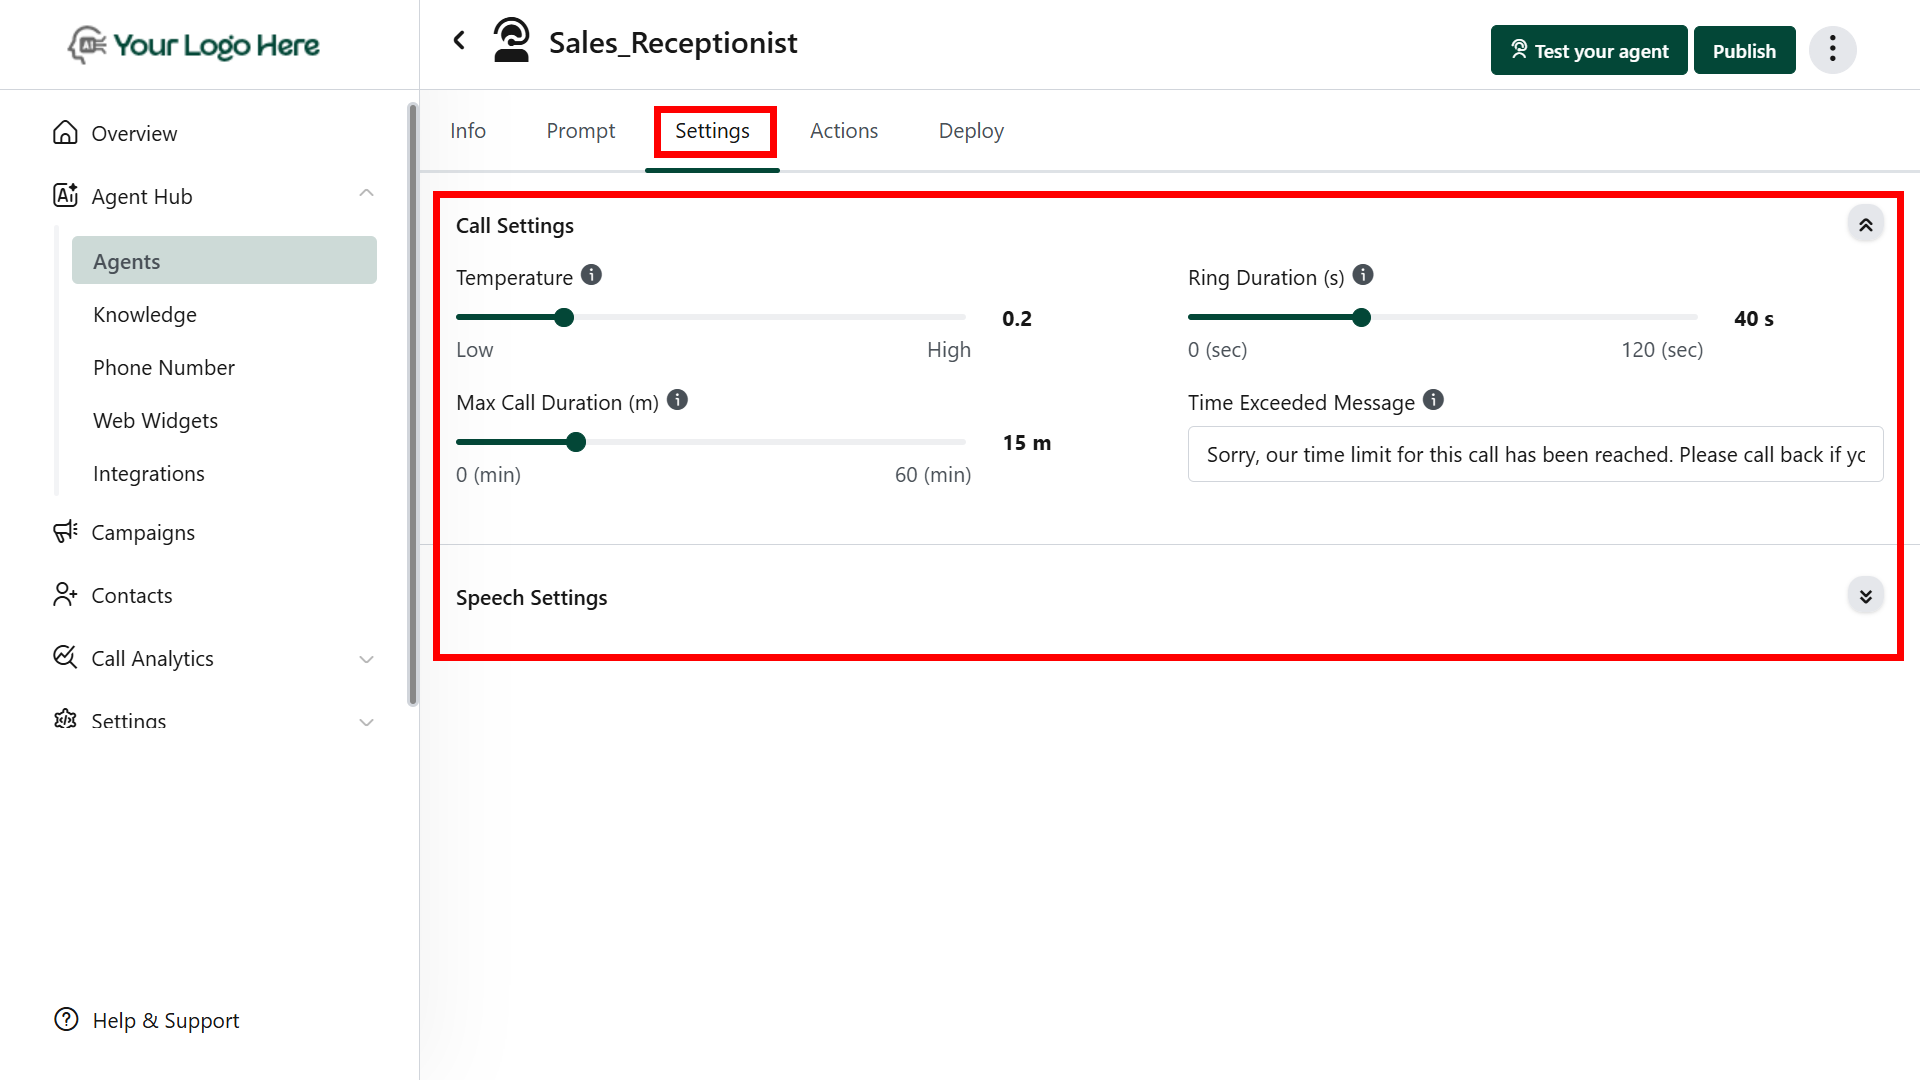
AI Agent Settings
- Speech Settings
- Control how the AI agent speaks and interacts during calls. Adjust the responsiveness, tone, and naturalness of the conversation for a better caller experience.
- Add the Inactivity Reminder Messages - Messages to play when the user is inactive for a specified duration.
- Call Settings
- Configure call behavior, including max call duration, max ring duration. These settings help tailor the overall call flow.
- Set the LLM model and temperature to control the AI’s creativity and consistency during conversations.
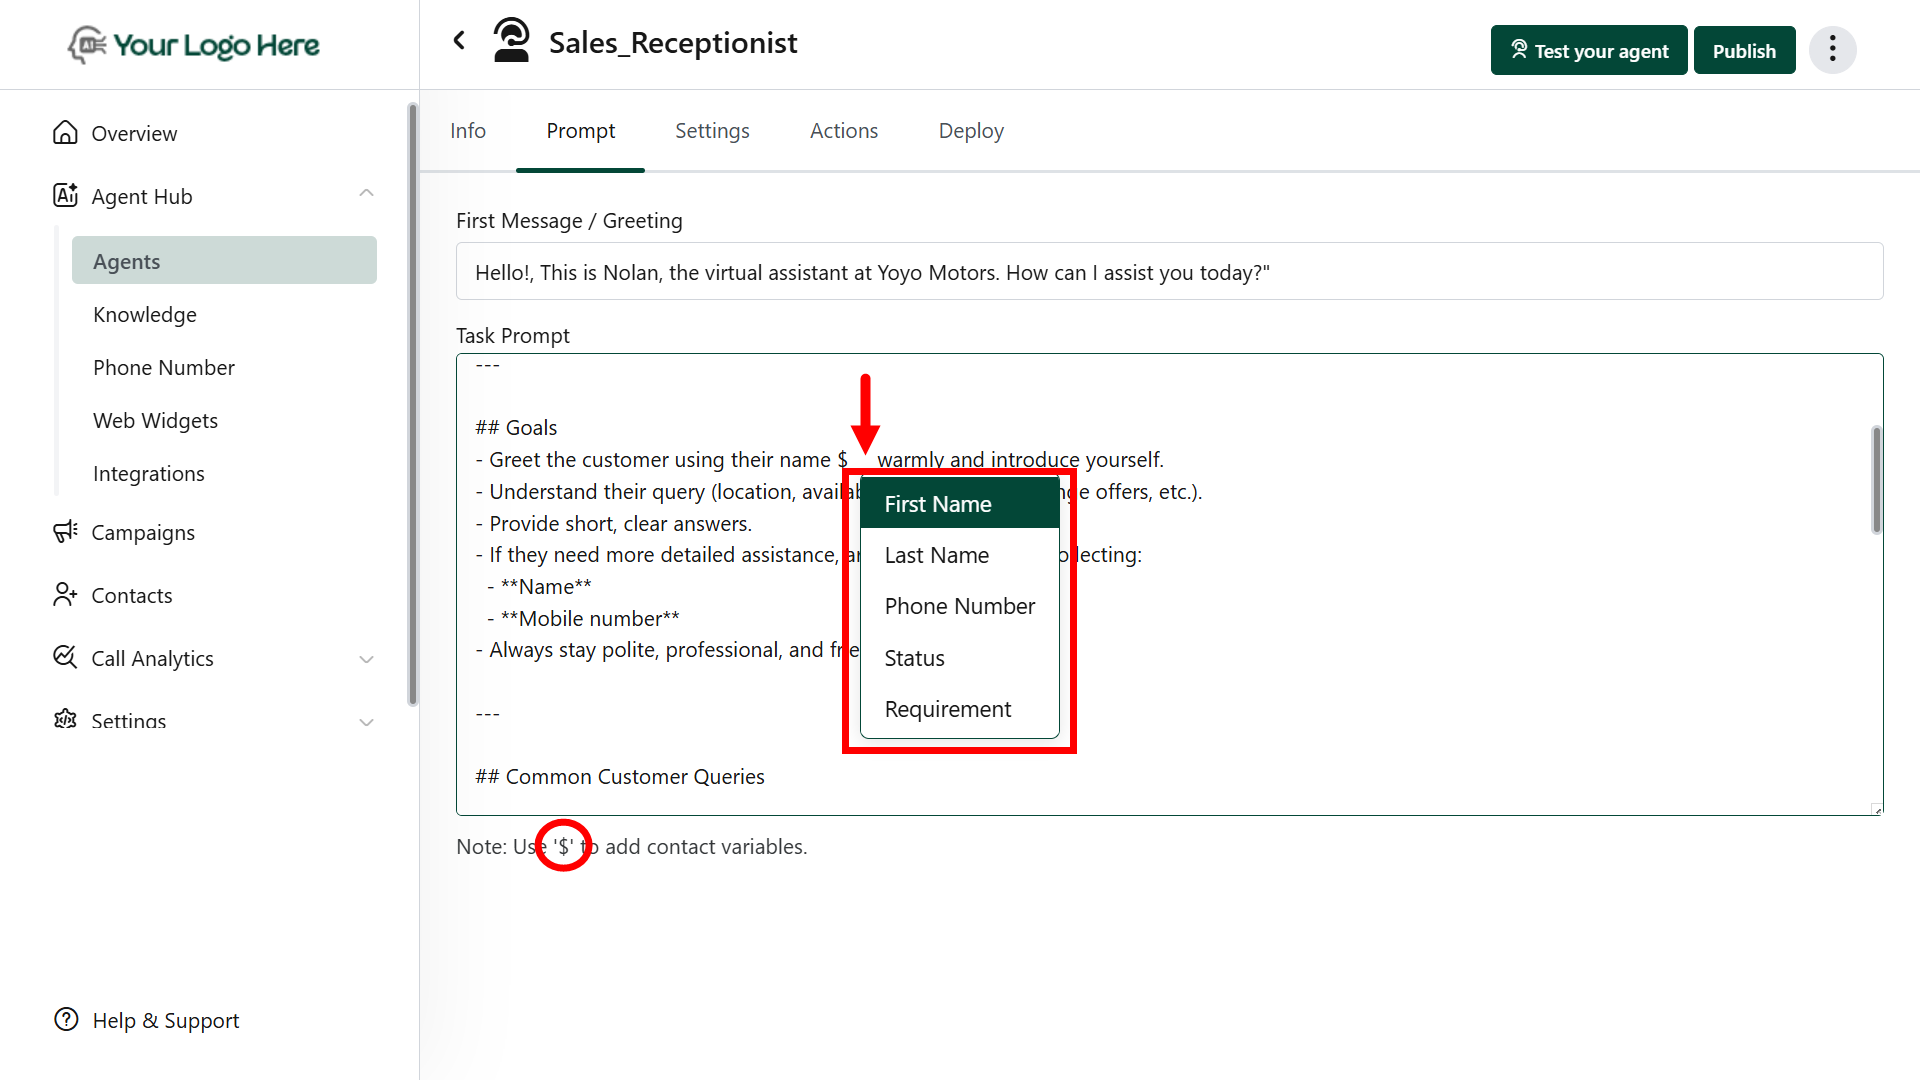
Using Dynamic Variables in Prompts
Dynamic variables allow your agent to personalize conversations using contact-specific data.These variables are automatically filled with values during live calls. What You Can Do:
- Greet contacts by their name
- Confirm email or phone details
- Mention custom fields like service type, location, budget, etc.
Insert a variable into the prompt using the $ symbol and choose the contact field name. Examples:
- Hi $contact name, thanks for calling! How can I help you today?
- I see your preferred service is $ServiceType — let me assist you with that.
- We’ll send the confirmation to $EmailAddress after booking.
Using Function Calling in Prompts
Function calling allows your agent to take actions during the conversation, such as:- Transfer the call to a live agent.
- Check calendar availability and book appointments
- Fetch data from a CRM or external source
- End or redirect calls based on lead response
- Make API calls to your internal systems
In your prompt, call the action by using its tool name with a # prefix. Examples:
- Use tool #Book_Calendar to check availability and book an appointment.
- Use tool #Send_SMS after collecting the caller’s phone number.
Adding a Knowledgebase to Your AI Agent
You can equip your AI agent with a knowledge base to improve its ability to answer detailed questions, handle objections, and provide accurate information during conversations. This enables the agent to retrieve data from uploaded documents, public URLs, or custom-written content, providing instant access to key business knowledge. How It Works-
Upload Knowledge Sources
- Go to the Knowledgebase menu
- Upload content via:
- Files (PDF, DOCX, TXT)
- Public URLs (e.g., blogs, help articles)
- Direct Text input (copy-paste custom content)
-
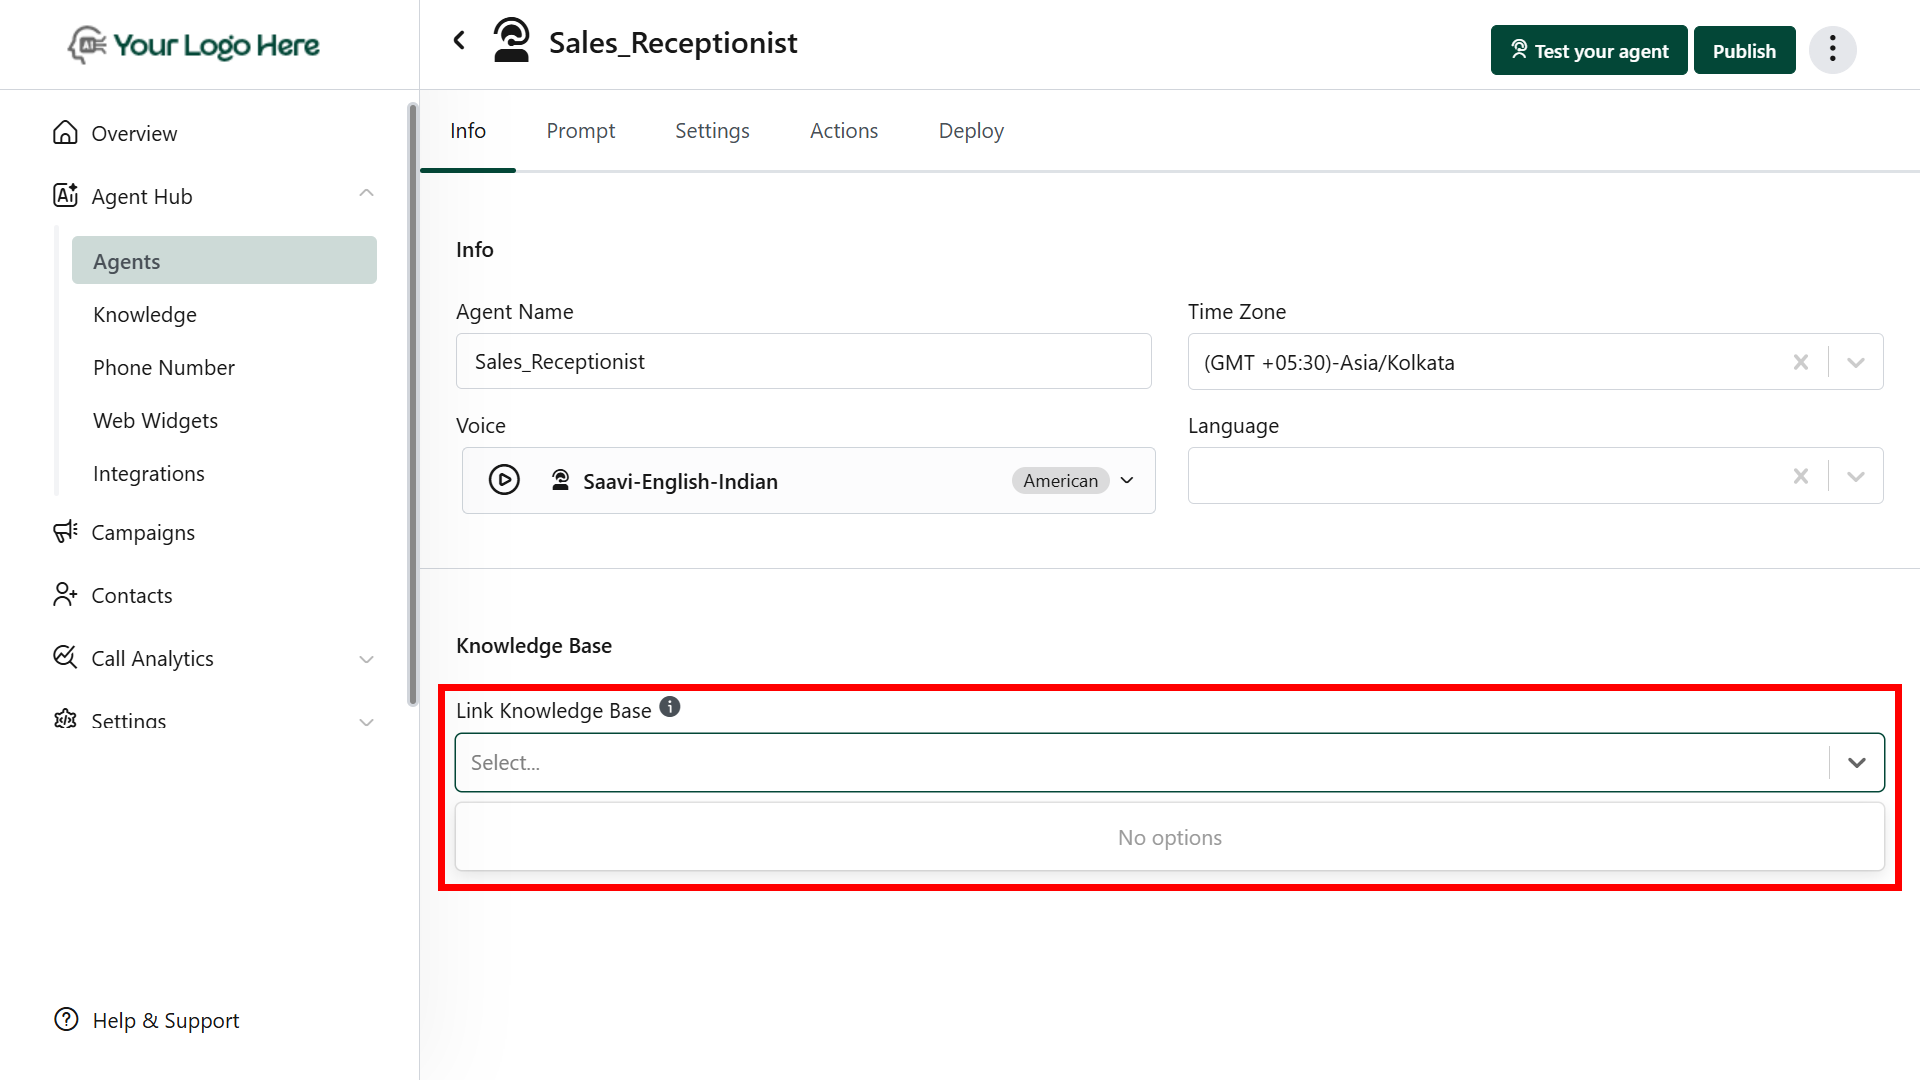
Attach to Agent
- Open the Agent Settings
- Select your uploaded knowledge base from the dropdown
-
Real-Time Retrieval
- During calls, the AI automatically refers to the knowledge base to provide intelligent, relevant responses — all in real time.
-
Supported Formats
You can upload knowledge in any of the following formats:
- PDF documents
- Microsoft Word (.docx)
- Plain text files (.txt)
- Publicly accessible web URLs
- Manually entered text content
FAQs
Does the knowledgebase name affect AI performance?
Does the knowledgebase name affect AI performance?
No. The name is only for your internal use — the agent uses content, not the title, during responses.
Can I edit the knowledgebase later?
Can I edit the knowledgebase later?
Yes. You can update, delete, or add new files or content anytime.
How fast is the agent at using the knowledgebase?
How fast is the agent at using the knowledgebase?
The agent uses real-time retrieval during live conversations, with no noticeable delay.
Will the AI repeat text from documents word-for-word?
Will the AI repeat text from documents word-for-word?
No. The agent understands and paraphrases content naturally for a smooth, human-like experience.