How It Works
- Create a Web Widget
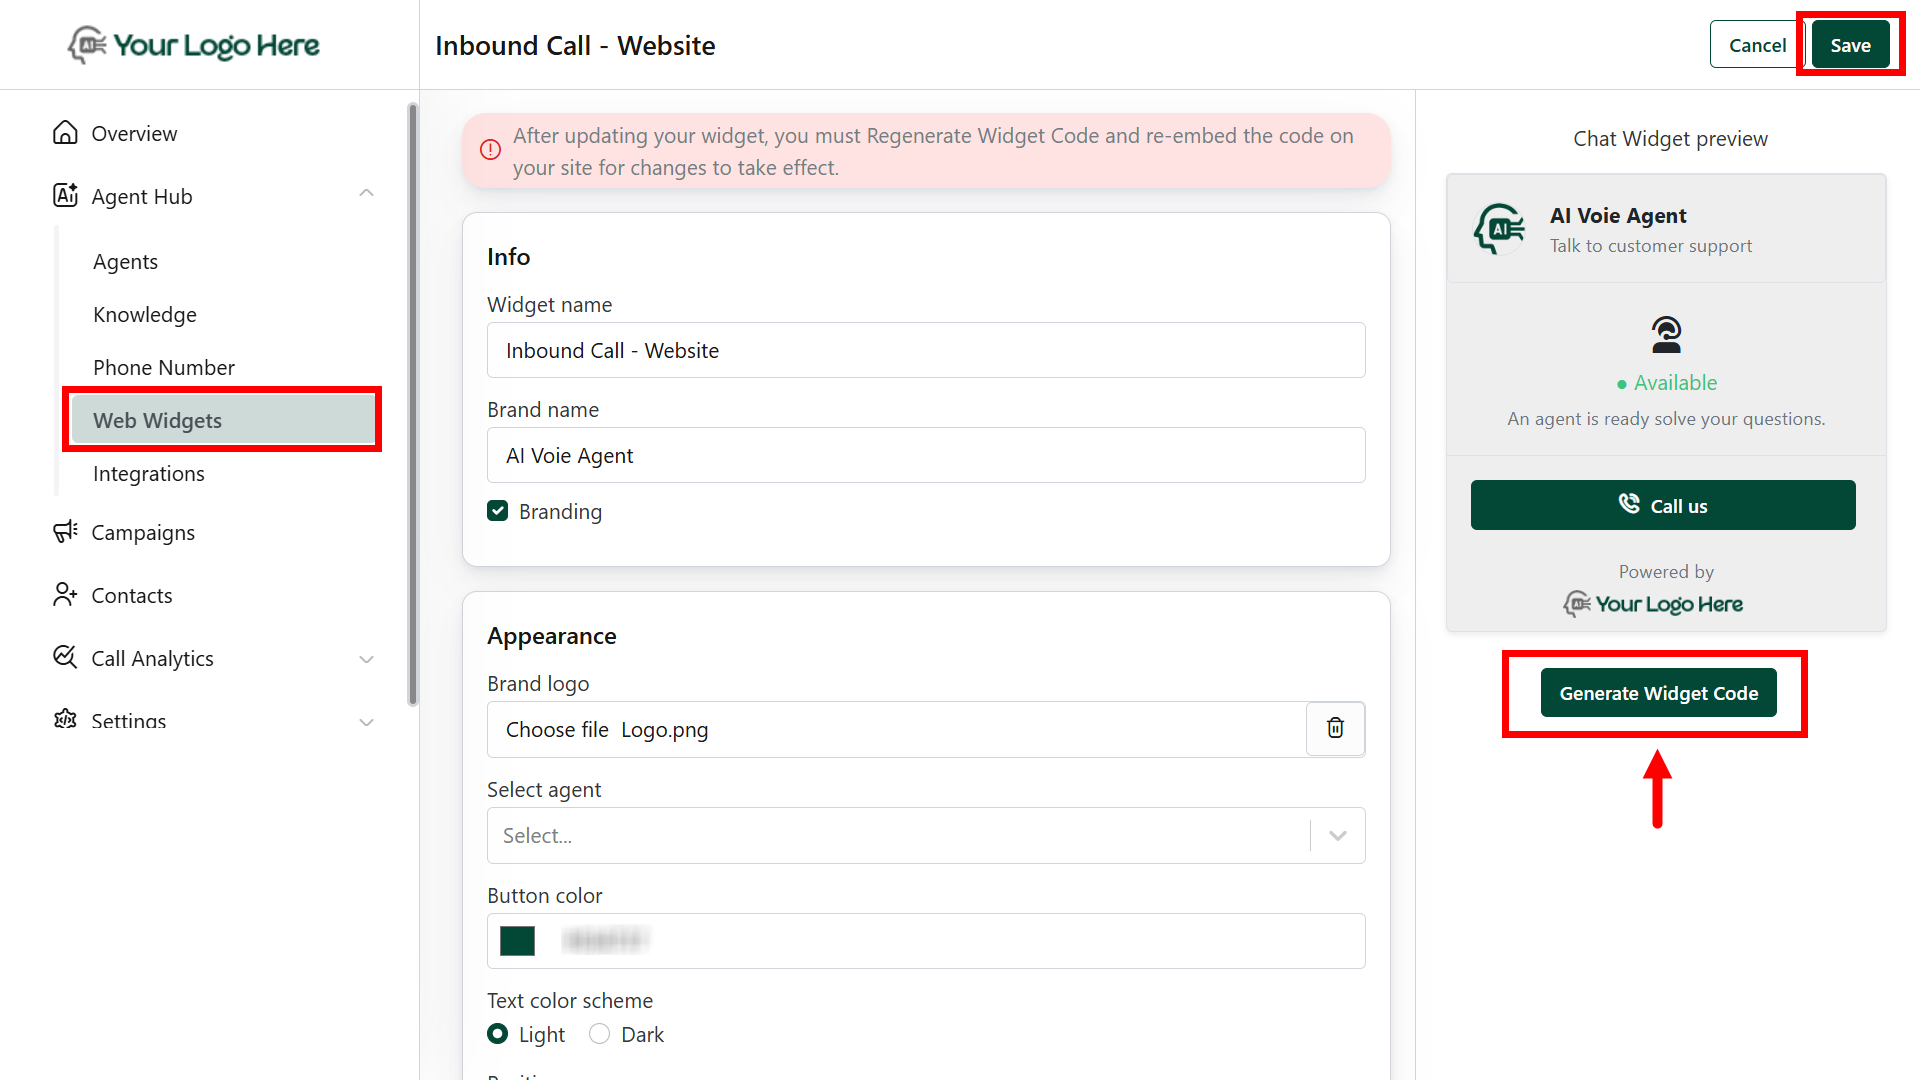
- Go to Web Widgets under the Agency Hub
- Click Create Widget
- Configure:
- Widget Name
- Branding (logo, colors, welcome message)
- Call-to-action text
- Deploy the Widget
- Copy the embed code
- Paste it into your website, landing page, or funnel builder
- Once live, visitors will see a “Click to Call” or “Talk to Assistant” button
- Start the Conversation
- When a visitor clicks the widget, a voice call is initiated with your AI Agent
- The agent engages, asks qualifying questions, and guides the caller based on your configured prompt
- After the Call
- AI uses #Extract_Info to collect details like name, email, and interest level
- Creates or updates leads in your CRM
- Uses #Book_Calendar to schedule appointments
- Stores full call log, summary, and transcript in the Call History tab.
Benefits
- No phone number required — web-based calling
- Converts passive website traffic into qualified leads
- Works great with landing pages, offer pages, and ad funnels
- Available 24/7 with no human involvement
The widget must be deployed in a client-owned website or pageUse different widgets for different use cases (sales, support, booking)