Core Concepts
Import Agents
You can seamlessly import your existing agents from supported platforms like Retell AI and Vapi, making it easy to migrate or replicate proven workflows without starting from scratch.
This is ideal for agencies managing multiple accounts or transitioning existing setups into a white-label environment.
This feature is only available for Agency users, not for client app users.
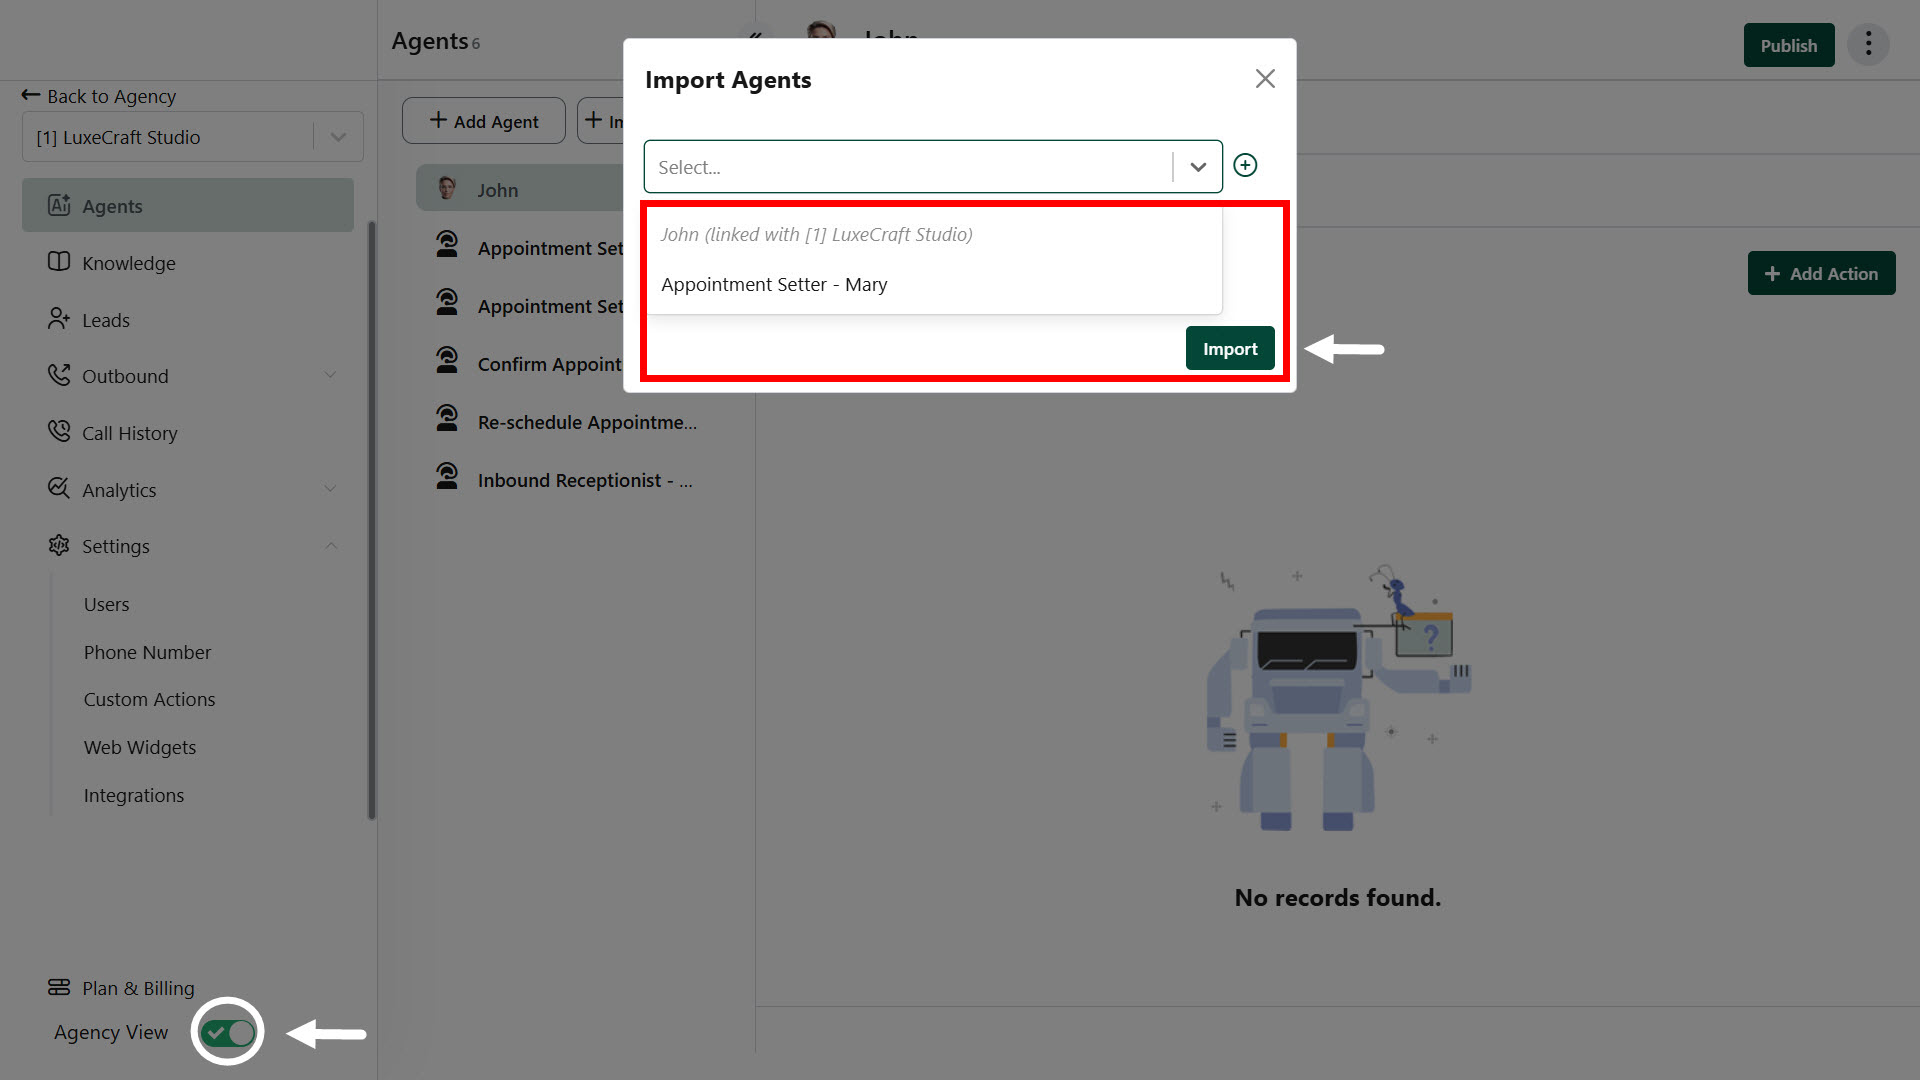
Make sure to enable Agency View from the footer of the client account menu to access this functionality.
Steps to Import an Agent
- Navigate to the Agent Import Section
- Go to the Agents tab in your dashboard.
- Click “Import Agent”.
- Select Agent(s) to Import
- A list of available agents will appear.
- You can select one or multiple agents for import.
- Optional Settings (Before Import)
- Import all associated phone numbers
- Import existing call logs
- Review & Confirm
- Review selected agents and settings.
- Click “Import” to begin the process.
Best Practices
- No Duplicate Imports
You cannot import agents that already exist in your current account or are linked to another workspace. - Only Core Data Is Imported
The import will include the agent’s core setup and settings only. - Manual Setup Required for Advanced Features
After importing, you’ll need to manually configure:- Function Calling actions
- Post-call event actions
- Web widget setups or calendar integrations (if applicable)
- Use Naming Conventions
Rename imported agents clearly to avoid confusion and align with your project or client structure.